Showing posts with label South Canara Cuisine. Show all posts
Wednesday, July 29, 2015
Masala Sanna Khotte - Spicy Idli (2)
During my cabbage marathon cooking, I thought of masala sanna khotte. These steamed dumpling is a variation of Masala Sanna Khotte(1).
Masala Sanna Khotte - 2
Spicy Steamed Dumpling
Ingredients
1/4 cup toor daal
1 cup rice
Grind
8-10 byadgi chilies, roasted in few drops of coconut oil
1/2 cup fresh coconut
You will also need
1/2 tsp asafetida
1 tsp tamarind paste
salt
1 cup finely shredded cabbage
Coconut oil to grease the mold
Method
1. Soak toor daal and rice overnight.
2. Next morning, grind to a smooth paste along with roasted chilies and coconut.
3. Cover and set aside for about 8 -10 hours.
4. Right before steaming the idlies, stir in asafetida and tamarind paste. Add shredded cabbage.
5. Adjust the batter consistency, adding more water as needed.
6. Grease idli mold with coconut oil. Pour the batter.
7. Steam for about 45 minutes.
8. Serve hot with coconut oil. Serve as an accompaniment with your meal.
Note -
1. For most authentic flavor, use containers made with jackfruit leaves.
2. This idli is not as fluffy as the usual idli.
Print Page
Monday, July 27, 2015
Kultha Idli - Horsegram Idlies
Idlies using kulith or horsegram is a traditional Konkani delicacy. It imparts a distinct flavor so it may be an acquired taste. For a truly authentic flavor, do use coconut oil for greasing the idli moulds and also serve these idlies hot off the steamer along with a drizzle of coconut oil.
Kultha Idli
Horsegram Idlies
Ingredients
1 cup urad daal
1/2 cup kulith sprout
2 cups rice
1/2 tsp fenugreek seeds
salt to taste
coconut oil as needed
Method
1. Soak urad daal, kulith/horsegram and (rice+fenugreek seeds) separately.
2. Drain and grind to a smooth paste.
3. Cover aside to ferment for 7-8 hours. Add salt and mix.
4. Grease idli moulds with coconut oil or any oil of your choice - although coconut oil is preferred.
5. Pour a ladleful of batter.
6. Steam the idlies.
7. Serve with coconut oil and chutney of your choice.
Note -
1. Traditionally, kulith are soaked, drained and used. I use kulith sprouts for this recipe.
Print Page
Saturday, July 25, 2015
Masala Sanna Khotte - Spicy Idli (1)
I haven't eaten Khotte in ages. But these days, Indian storeowners bring many uniquely exotic vegetables. So I am hoping that one day I may even get jackfruit leaves. You see, khotte are steamed in the containers made using jackfruit leaves. After they are steamed, the idli gets a very unique flavor. The leaves are meant to be discarded. When we visited "Robert is here" in Miami, I longingly looked at their jackfruit tree. I wished they were selling jackfruit leaves along with their delicious fruits. I guess, only a Konkani can understand that feeling about jackfruit leaves.;-)
Mom mentioned that Ram Nayak's Idli House in Matunga/King Circle area serve all the Konkani idlies - Khotte and masala khotte included. They are served with chutneys, but more importantly with coconut oil as well. There are two ways (with or without cabbage) Masala Khottes are made in my family. So for keeping records, I am going to blog both the methods. However, accept my apologies since there are no jackfruit leaves to be seen in my part of the world. So I steamed them in my usual idli stand. One can make banana leaves wrapper as I had tried here. But still for qualifying it to be the authentic khotte, jackfruit leaves are essential.
Please note that these khotte are heavier than usual fluffy idlies. They are served as a side dish with your daily Konkani meal.
Masala Sanna Khotte - 1
Spicy Steamed Dumpling
Ingredients
1/4 cup toor daal
1 cup rice
Grind
8-10 byadgi chilies, roasted in few drops of coconut oil
1/2 cup fresh coconut
You will also need
1/2 tsp asafetida
1 tsp tamarind paste
salt
Coconut oil to grease the mold
Method
1. Soak toor daal and rice overnight.
2. Next morning, grind to a smooth paste along with roasted chilies and coconut.
3. Cover and set aside for about 8 -10 hours.
4. Right before steaming the idlies, stir in asafetida and tamarind paste.
5. Adjust the batter consistency, adding more water as needed.
6. Grease idli mold with coconut oil. Pour the batter. Traditionally, the batter is poured into the moulds made up of jackfruit leaves.
7. Steam for about 45 minutes.
8. Serve hot with coconut oil. Serve as an accompaniment with your meal.
Note -
1. For most authentic flavor, use containers made with jackfruit leaves.
2. This idli is not as fluffy as the usual idli.
Print Page
Thursday, July 23, 2015
Tingalavrya Bendi - White Beans Curry
Remember my post about the South Canara curries? Each curry has a distinct name and that name itself indicates which tempering to use, and thus each curry results in a unique flavor - although basic ground masala paste is coconut + tamarind + byadgi chilies. So those who are not very familiar with South Canara cusine may find each curry is orange colored but the name clearly tells not only the tempering, but also the consistency of the gravy, consistency of ground masala paste (coarse or fine), heat level (e.g. Ghasshi and Ambat are mild while koddel & Bendi/बेंदी are hot!)
When in Mumbai, I head straight to my most favorite Mahima Mangalore Stores at Hill Rd. They stock up some good Konkani delicacies. This is the place where you will get your Tingalavre and Fajjav - though they may not be on their display. Mostly, their display consists of usual snacks and other tidbits. But do ask the owner about those Konkani delicacies, and if they are in season, you may get them. So I was lucky that "Tingalavre" was in season. We make two curries with it. Bendi (Using Garlic tempering) and Tepla Randayi (Using Teppal/Tirphal).
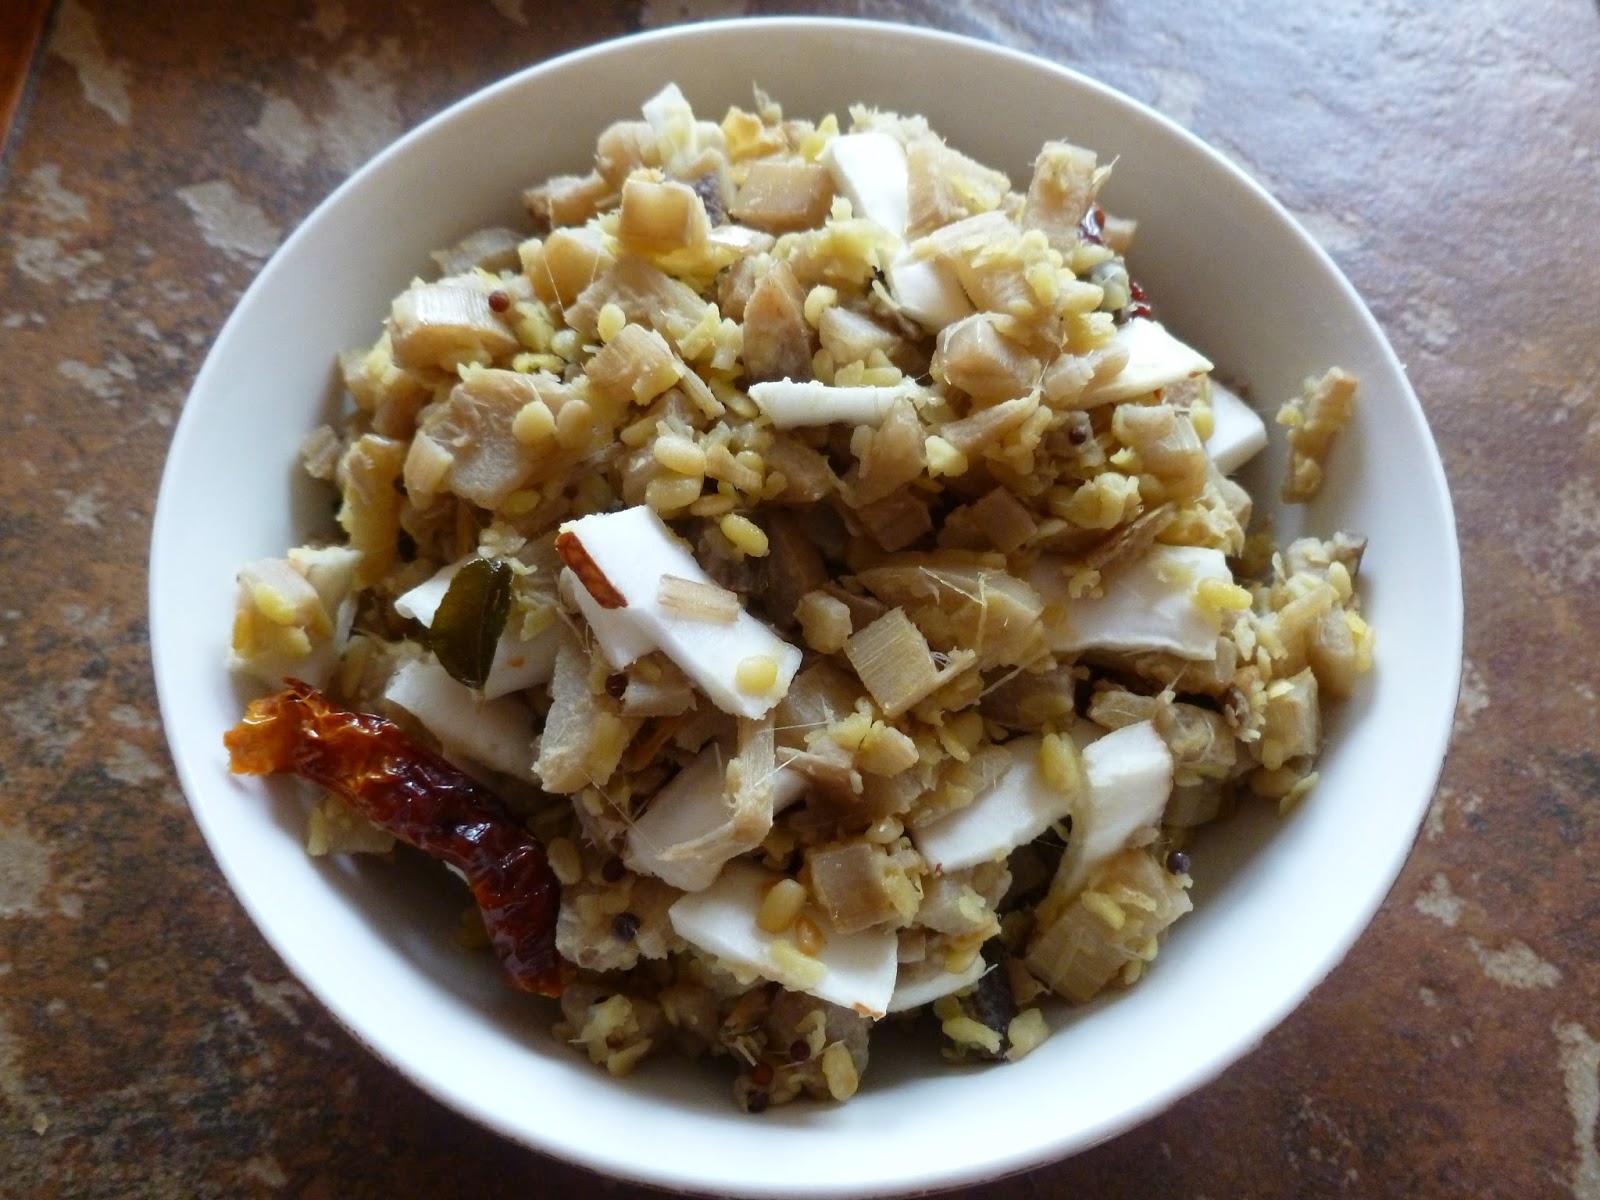
Tingalavrya Bendi
White Beans Curry
Ingredients
3/4 cup dry Tingalavre, soaked for 6 hours in adequate water
salt to taste
Grind
3/4 cups freshly scraped coconut
15 byadgi chilies, roasted quickly in few drops of coconut oil
1 1/2 tsp tamarind paste
Tempering
2 tsp coconut oil
5-7 cloves of garlic, peeled & smashed but still left whole
Method
1. Soak tingalavre in water for 6 hours. Drain and pressure cook using enough water. Set aside.
2. Heat a pan. Drizzle few drops of coconut oil. Roast byadgi chilies.
3. Grind fresh coconut, roasted chilies and tamarind to paste.
4. Pour cooked beans in a saucepan. Add ground masala paste. Add enough water per desired consistency.
5. Add salt to taste. Bring to boil. Switch gas to low. Let it simmer.
6. In a separate small saucepan, heat coconut oil. Add garlic cloves. Fry till brown.
7. Drizzle hot oil with garlic over the curry. Switch off the gas and cover the curry with a lid.
8. Serve with plain rice.
Note -
1. Traditionally, bendi (बेंदी ) is on thick side. Adjust water per your preference.
2. Bendi is also very hot. Adjust chilies per your preference.
Tingal Avre From Mahima Mangalore Stores, Bandra
Print Page
Sunday, July 12, 2015
Khubbya Randayi - Clams Curry
It's funny how I refer to the same ingredient by various different names based on the recipe that I am following. When I am making my maternal grandmother's South Canara style curry, I refer to clams as Khubbe. When I am making my paternal grandmother's Malvani style curry, I refer to the same clams as Tisrya. :-)
Today let's visit my South Canara heritage and relish Khubbya randayi or Manglore style Clams Curry. This recipe is exactly similar to Sungta Hinga udaak. But for some unknown reason, when making this curry with clams, it's always referred to as Khubbya Randayi and not Khubbya Hinga Udaak.
Khubbya Randayi
Ingredients
1 packet Costco little neck clams
1/2 tsp turmeric powder
Salt to taste (Adjust)
Grind to a fine paste
1 cup freshly scraped coconut
12-15 byadgi chilies, roasted in few drops of coconut oil
2 tsp tamarind pulp
Garnish
1 tsp coconut oil
1/2 tsp asafetida
Method
1. Scrub and clean the clams.
2. Place them in a heavy bottomed big container. Add 1/2 cup water and turmeric powder.
3. Cook till the shells are open. Switch off the gas. Cover
4. Let them cool down till they are easy to handle. Take out the flesh.
5. Drain the clam juice. Set aside.
6. Meanwhile, roast byadgi chilies using few drops of coconut oil. Grind to a very fine paste adding coconut and tamarind pulp. Add water as needed for grinding.
7. Place cooked clams, clam juice in the saucepan.
8. Add ground masala and enough water to get the desired consistency.
9. Adjust salt.
10. As the curry comes to a rapid boil, switch the gas to low.
11. Let it simmer.
12. Drizzle coconut oil and asafetida over the curry.
13. Let it simmer for at least 10 minutes.
14. Switch off the gas. Cover.
15. Serve with plain rice.
Note -
1. Clams may have salt content. Adjust salt accordingly.
2. Clams are covered with lots of sand. Scrub carefully, making sure that they are sand free before cooking.
3. Drain the clam juice to avoid any sand particles.
4. After initial cooking, discard any clams that don't open up.
5. When in season, add peeled, raw mango pieces to this curry. If using, add them along with ground masala paste. Adjust tamarind accordingly.
6. Many home cooks in Mumbai use a knife or viLi to crack the clams and then use them in the curry. In my family, we boil the clams first, and let the clams open the shells instead of using knife.
Saturday, July 11, 2015
Salgam Song - Turnips Curry
I spotted some fresh turnips/salgams at our farmers market. I decided to make "Saung". Traditionally, saung uses potatoes. I replaced them with turnips. This curry tasted delicious.
Salgam Song
Turnip Curry
Ingredients
3-4 medium turnips, peeled, cut into chunks
1 medium onion, roughly chopped
Salt to taste
1 tbsp coconut oil or any other oil of preference
Grind to a coarse paste
5-6 byadgi chilies, roasted in a drop of coconut oil
1 tbsp tamarind pulp
Method
1. Heat oil. Saute onion till golden brown. Do not let it burn.
2. Add turnip pieces, stir. Cover with a lid. Pour water on the lid. Let it cook.
2. Add ground masala paste. Saute for 1 minute.
3. Add 1/2 cup water. add salt to taste.
4. Bring to boil.
5. Let it simmer. This is a thick curry. Adjust consistency per your own preference.
Note -
1. The coconut oil gives a unique and authentic flavor. However, if you are bothered by the saturated fat contents in the coconut oil, you can use canola or olive oil. and then add a few drops of coconut oil for flavor.
2. Instead of grinding the masala, sometimes, I just mix chili powder and tamarind pulp for a quick fix.
Print Page
Tuesday, July 7, 2015
KeLya Gabbya Upkari - Banana Stem Stir Fry
When I wanted to blog about Sanjimaayi's KeLya Gabbya Kochcholi, I substituted banana stems with Hearts of Palm from the can. I had thought then, that I would need to make a trip to Matunga, Mumbai to get the fresh banana stem. But never in my wildest imagination, I had thought of getting fresh banana stem right here in my city.
I was overjoyed to see it and wasn't even sure if I would know how to cut it. But the shop owner told me what needs to be done.
KeLya Gabbya Upkari
Banana Stems Stir Fry
Ingredients
1 banana stem, peeled & chopped about 2 cups
salt to taste
1/4 cup yellow moong daal, soaked for 1/2 hour
Tempering
1/2 tbsp. coconut oil
1/2 tsp mustard seeds
1/2 tsp asafetida
3-4 byadgi chilies, halved
2 springs curry leaves, torn
Garnish
A generous handful of scraped coconut
Method
1. Take a banana stem and give a gash to peel off outer layer till you get the inside banana stem. Please see the cross section of the banana stem. You need to get rid of at least 2 layers to get inside the stem.
2. Dice the peeled, tender banana stem into small pieces. It should be cut smoothly. Otherwise if it is too rough to be cut, discard the piece.
3. Put the diced banana stem into a buttermilk to avoid discoloration.
4. Heat oil in a saucepan/kadhai/bogaLe. Add the spices and chilies. As they splutter, add soaked moong daal. Stir fry for 30 seconds. Add drained banana stem pieces. Discard the buttermilk.
5. Cover with a lid. Pour water onto the lid. Let it cook.
6. Add salt to taste.
7. Garnish with scraped coconut or coconut pieces.
Note -
1. I used coconut pieces instead of scraped coconut.
2. Instead of moong daal, chana daal can also be used.
Banana Stem/KeLya Gabbo
Print Page
Wednesday, July 1, 2015
Pumpkin Leaves Daal
This month, I will try my best to show case some unusual veggies. Let's see if my farmers market, Indian stores and my enthusiasm keep up with this pledge!
Today's recipe is Pumpkin Leaves daal. Pumpkin leaves and stems are very much edible and they go well with this Konkani masala. There are two ways you can make this daal. You may choose to temper it with garlic cloves or you may use tirphal/teppal. But please be mutually exclusive about it. Do not use both as the flavors will counter balance each other.
Pumpkin Leaves Daal
Ingredients
1 bunch Pumpkin leaves
1/2 cup toor daal
1/2 tsp turmeric powder
salt to taste
Soak in 1/4 cup warm water
6-7 tirphal/teppal
Grind to a coarse paste
1/2 cup coconut
1 tbsp. coriander seeds, roasted
5-6 black peppercorns
5 byadgi chilies
1 tsp tamarind pulp
Garnish
Few drops of coconut oil
Method
1. Shred pumpkin leaves roughly. If the stems are tender, cut it into about 2" pieces. Remove any fibers that are attached to the stem, by cutting a little opening and peeling off the fiber - the way you would do for drumsticks.
2. Pressure cook daal with turmeric powder and adequate water as well as pumpkin leaves and stems.
3. Mash daal lightly after cooking.
4. In a saucepot, add cooked daal and cooked pumpkin leaves and stems.
5. Roast coriander seeds, black pepper corns and byadgi chilies. Grind to a coarse paste with coconut and tamarind. Add water as required for grinding.
6. Pour the masala paste with water into the curry.
7. Add salt and teppal with water. Bring to boil.
8. Drizzle few drops of coconut oil as the curry is boiling.
9. Serve with plain rice.
Note-
1. Generally tirphal or teppals are given a little pounding before soaking. Make sure that the berries are not totally crushed or powdered.
2. Do remove the black seeds in teppals.
3. Teppals are added to enhance the flavor. They are not meant to be eaten.
4. Variation - Instead of teppals, heat coconut oil and fry garlic pieces and drizzle over the curry.
Print Page
Monday, June 15, 2015
Surnache Kaap - Indian Yam Fritters
So far, I had always used freshly frozen suran/yam from Indian stores. But last time, I found fresh suran. I took a small chunk to make kaap/kachrya/fodi. This is a typical vegetarian delicacy which is enjoyed in Konkani homes along with simple daal and rice especially on the vegetarian (shivraak) day.
SurNache Kaap
Indian Yam Fritters
Ingredients
1 chunk of suraN/Indian yam
2 cups water + 5 kokums or 1 tsp tamarind paste
Mix
1/2 tbsp. chili powder
salt to taste
1/2 tsp asafetida
1/2 tsp turmeric powder
To dredge
1 tbsp. rice flour
1 tbsp. fine rawa/semolina
Oil for shallow frying
Method
1. Peel yam carefully, discarding all the outer skin.
2. Cut into thick "fillets".
3. Soak them in kokum or tamarind water for 15 minutes. Drain.
4. Mix chili powder, salt, asafetida and turmeric powder. Place wet yam pieces and apply this paste so it's uniformly coated.
5. Heat a cast iron pan. Add oil for shallow frying.
6. Dredge each yam "fillet" in the rice flour + rawa mixture.
7. Place in a single layer on hot tawa.
8. Cook on low flame, covering with a lid. Remove the lid after 7-8 minutes. Flip on the other side. Let it cook without the lid.
9. Let it crisp up from both the sides.
10. Place on a paper towel to absorb any excess oil.
Note -
1. Kokum or tamarind water soak is needed since suran/Indian yam generally results in a nasty itch to the throat. Kokum or tamarind takes care of this issue.
Print Page
SurNache Kaap
Indian Yam Fritters
Ingredients
1 chunk of suraN/Indian yam
2 cups water + 5 kokums or 1 tsp tamarind paste
Mix
1/2 tbsp. chili powder
salt to taste
1/2 tsp asafetida
1/2 tsp turmeric powder
To dredge
1 tbsp. rice flour
1 tbsp. fine rawa/semolina
Oil for shallow frying
Method
1. Peel yam carefully, discarding all the outer skin.
2. Cut into thick "fillets".
3. Soak them in kokum or tamarind water for 15 minutes. Drain.
4. Mix chili powder, salt, asafetida and turmeric powder. Place wet yam pieces and apply this paste so it's uniformly coated.
5. Heat a cast iron pan. Add oil for shallow frying.
6. Dredge each yam "fillet" in the rice flour + rawa mixture.
7. Place in a single layer on hot tawa.
8. Cook on low flame, covering with a lid. Remove the lid after 7-8 minutes. Flip on the other side. Let it cook without the lid.
9. Let it crisp up from both the sides.
10. Place on a paper towel to absorb any excess oil.
Note -
1. Kokum or tamarind water soak is needed since suran/Indian yam generally results in a nasty itch to the throat. Kokum or tamarind takes care of this issue.
SuraN/Indian Yam
Print Page
Monday, April 27, 2015
Cabbage Appe
I make appe pretty regularly. Every now and then, I change the recipe by changing the proportion of daals, rice, adding quinoa, adding 17 beans instead of just regular daals or using green peas daal and so on. The other day, I had a chunk of cabbage in the fridge. So I decided to make mixed daal appes with cabbage as a snack turned meal.
Cabbage Appe
Cabbage & Daal fritters
Ingredients
3/4 cup urad daal
1/4 cup moong daal
1/4 cup chana daal
1/4 cup rice
1/2 tsp fenugreek seeds/methi
2 tbsp. pohe - rinsed
Stir in
finely shredded cabbage - about 1 cup
2-3 green chilies, minced (optional)
2 tbsp. minced cilantro
salt as needed
1/2 tsp asafetida
Method
1. Soak all the daals and rice with adequate water for about 6 hours.
2. Drain and grind, adding rinsed pohe to a smooth batter.
3. Cover and keep aside for 2 hours.
4. Stir in salt, cabbage, cilantro, asafetida and chilies - if using.
5. Heat appe pan/patra/kayili. Add a few drops of oil in each cavity.
6. Pour a spoonful of batter.
7. Cover and let it cook on medium flame.
8. Drizzle more oil as needed.
9. Flip and cover on the other side.
10. Serve hot with chutney of your choice.
Note -
1. Any vegetable of your choice can be added - such as shredded carrots/radish/zucchini/spinach etc.
Print Page
Sunday, April 26, 2015
Sukil Mori Randai - Dried Shark Curry
Mori Randai with Rosamatta Rice
Every once in a while, mom made "Mori" - baby shark that was available in the Mumbai market. Mori is a special fish which needs to be deskinned by the fisherwomen. But once cleaned, it has just one center bone that makes it easier to eat especially for the people who don't eat fish due to its bones.
Mom made mori several ways. She made it Konkani way by making hingaudak but it was called Mori Randai or Malvani curry by using garam masala, which was called moriche mutton. The same curry was made in a dry version, which then was called moriche suke. Sometimes she simply fried it.
Very rarely, mom got dried mori. This was treated little differently. The usual orange curry was prepared but for dried fish, it was made hotter and spicier. and it was always tempered with a substantial amount of garlic cloves.
I found this dried mori - product of Sri Lanka - at our local Indian Stores. So I remembered my mom's curry.
Sukil Mori Randai
Dried Baby Shark Curry
Ingredients
1 packet Dried Mori/Baby Shark
Salt (use only if necessary - read notes)
Grind to a smooth paste
1 cup fresh coconut
1 tsp. coriander seeds, roasted
15 byadgi chilies, roasted (This curry is spicy!)
5 cloves garlic
2 tsp. tamarind pulp
Tempering
1/2 tbsp. coconut oil
7 garlic cloves, sliced or smashed
Method
1. Soak mori in warm water.
2. Grind masala to a fine paste.
3. Drain mori. Place in a saucepan.
4. Pour masala and 1 cup water.
5. Bring to boil.
6. Switch gas to low. Let it simmer.
7. Heat a small saucepan. Heat coconut oil
8. Add garlic cloves and fry till they are brown.
9. Immediately drizzled the tempered oil with garlic into the curry.
10. Cover with a lid.
11. Switch off the gas immediately.
12. Serve with plain rice.
Note -
1. Dried fish already has plenty of salt since salt acts as a preservative. So adjust salt only as needed.
2. I got the packet of dried mori which was pre-cleaned and boneless.
3. I recently came to know that Mori is also known as Mushi in Indian vocabulary.
Thursday, April 23, 2015
Beet Upkari
I made this delicious Konkani style upkari with tender beets that I found in our farmers market.
Beet Upkari
Stir Fried Beet roots
Ingredients
3 beetroots, boiled
salt to tasteTempering
2 tsp oil - preferably coconut oil1/2 tsp mustard seeds
1/2 tsp cumin seeds (optional)
1/4 tsp asafetida
5-7 curry leaves
2 byadgi chilies, halved
4-5 cloves garlic, slivered
Garnish
1 tbsp coconut
Method
1. Rinse beets thoroughly. Pressure cook. Peel and dice
2. Heat oil - preferably coconut oil in a saucepan.
3. Add all the ingredients for tempering.
4. As they sizzle, and garlic changes color to a shade darker, add beetroot pieces.
5. Sauté well. Add salt to taste.
6. Garnish with freshly scraped coconut.
7. Serve as a side dish with your daily meal.
Note -
1. You can omit garlic.
2. If the beetroots have tender greens, wash and shred them and add them in the tempering before adding beetroots. Do not pressure cook the greens.
Tuesday, March 17, 2015
Chana Daal Chutney
This is a unique wet chutney with daal. If you think it's too raw for your taste buds, use coconut along with chana daal or substitute puffed chana daal.
Chana Daal Chutney
Ingredients
1/2 cup chana daal, soaked for 2 hours
3-4 red or green chilies
1 cup cilantro
1 tbsp. tamarind paste
salt to taste
Tempering
1 tsp. oil
1/2 tsp. mustard seeds
1/2 tsp. asafetida
1 sprig curry leaves, torn
Method
1. Soak chana daal in adequate water for at least 2 hours, not more than 4 hours.
2. Grind drained daal with chilies, cilantro, tamarind paste and salt.
3. Heat oil in a small container. Splutter spices and curry leaves.
4. Drizzle tempered oil over the chutney.
Note-
1. This chutney may require acquired taste buds. If you think, it may be too raw for your taste, add coconut along with chana daal or use puffed chana daal. If using puffed chana daal, there is no need to soak.
Tuesday, March 3, 2015
Karate Bilimbi Ghasshi
Karate Ghasshi is an exception to the definition of the "Ghasshi" in South Canara culinary glossary. Every ghasshi has a tempering of mustard seeds and curry leaves, but it never has jaggery.
Karate Bilimbi Ghasshi
Ingredients
3 karela/karli/bittergourd, scraped, deseeded, chopped
1/2 tsp turmeric powder
7-8 Bilimbi, lightly crushed
salt to taste
2 tbsp. jaggery or to taste
Grind
1/2 cup fresh coconut
1 tsp urad daal, roasted
1 tbsp. coriander seeds, roasted
6-7 fenugreek seeds, roasted
5-6 byadgi chilies, roasted
Tempering
1/2 tbsp. oil - preferably coconut oil
1/2 tsp mustard seeds
2 sprigs curry leaves, torn
Method
1. Add bitter gourd, bilimbi and turmeric powder in a saucepan. Add 1/4 cup water. Cook on a medium flame.
2. Roast coriander seeds, urad daal, chilies and fenugreek seeds. Grind along with coconut, adding water as needed.
3. Pour this ground paste into the bitter gourd mixture. Add 1/2 cup water. Bring to boil. Add salt and jaggery.
4. Simmer till it reaches thick consistency.
5. In another small saucepan, heat coconut oil. Add mustard seeds and curry leaves.
6. Drizzle this tempering over the curry. Cover with a lid. Switch off the gas.
Note -
1. The same curry can be made with raw mango or ambado instead of bilambi.
Print Page
Sunday, February 15, 2015
Jeer-Mirya Idli
Jeera-Miri (Cumin Seeds & Black Peppercorns) make a wonderful combo and its coconut based cold curry is devoured in Konkani families called "Jeer-Mirya" Kadhi. The same combo flavors the usual idli batter with a hint of coconut oil. The result is "Jeer-Mirya Idli".
Do serve with coconut oil for the authentic flavor. Drizzle, Drop or smear - you decide!
Jeer-Mirya Idli
Cumin Peppercorn steamed dumpling
Ingredients
1 recipe idli batter
Roast and pound coarsely
1 tsp. cumin seeds
10-12 black pepper corn
Coconut oil for greasing idli moulds
Method
1. Prepare Idli batter as described here.
2. Roast cumin seeds and black peppercorns separately. Pound them to a coarse powder.
3. Stir in the powder in the idli batter.
4. Grease the idli mould using coconut oil.
5. Prepare idli by steaming.
6. Serve hot idlies with chutney of your choice and coconut oil on side.
Note -
1. Do not powder cumin seeds/peppercorns too finely.
2. Any oil of your choice can be used for greasing, however coconut oil gives the authentic flavor.
Print Page
Saturday, January 31, 2015
Kalya Vatanyache Aambat
Initially, My maternal grandmother was not familiar with "Black Peas" or Kala vatana which is celebrated in Malvani cuisine. But due to many intercommunity marriages in the family, and her willingness to learn and include novelty in her daily cooking, she cooked these lovely black pearls using her traditional Konkani Masala.
As I have mentioned before, when a South Canara vegetarian curry has onion tempering, it is called "Ambat". So this is how "Kalya Vatanyache Ambat" was created. Its name conveys it all. It inherits the influence of Marathi and Konkani. Aren't food and language meant to nurture and connect people? Who are we to judge if it's authentic or not?
KaLya Vatanyache Ambat
Black Peas Curry
Ingredients2 cups black peas/Kale Vatane sprouts
1 tbsp onion, chopped
salt to taste
Grind to a fine paste
1/2 - 3/4 cup fresh coconut
4 - 5 byadgi chilies, roasted in a few drops of coconut oil
2 tsp tamarind pulp
Tempering
1 tsp oil (use coconut oil for the authentic flavor)
1 tbsp chopped onion
Method
1. Pressure cook black peas sprouts and chopped onion, adding adequate water .
2. Grind the masala per the directions above. Make sure to grind finely, adding little water as necessary.
3. Pour cooked sprouts along with cooked liquid in a saucepan. Add ground masala to the saucepan. Adjust water to make not very thin but not thick gravy. Add salt . Bring to boil. Simmer.
4. Heat oil in a small saucepan. Add chopped onion. Saute till it becomes brownish but not burnt. Pour the sizzling oil in the curry. switch off the gas. Cover immediately.
5. Serve with plain rice.
Note -
1. You can add a pinch of turmeric powder when peas are getting cooked.
2. You can also add a spoonful of cooked peas to the coconut mixture while grinding.
3. Instead of onion tempering, you can give the garlic tempering. Just note that the name of the curry will change to "Koddel". :-)
4. Please do not confuse these black peas with whole urad or black beans. These are small black peas grown in Maharashtra.
Friday, January 30, 2015
Prawns Curry with Bilmbi
After getting Bilimbi, adding them to the traditional prawns curry was just a natural progression. Here, bilimbi acts as a souring agent and hence tamarind or kokum is not used.
It's amazing to note the number of souring agents used in different parts of India. Tamarind, Kokum, Bilmbi, Ambado, Kachri (Rajasthan), Amchoor, Raw mango, Vinegar, Yogurt...the list is endless.
Prawns & Bilmbi curry
Ingredients
1 1/2 cups prawns, deveined, cleaned
salt
1/2 tsp turmeric powder
Grind to a fine paste
1 cup freshly scraped coconut
1 tbsp coriander seeds, roasted
7-8 black peppercorn, roasted
A small piece of onion
7-8 byadgi chilies, roasted
Tempering
1 tsp oil - preferably coconut oil
2 tbsp. minced onion
A pinch of turmeric powder
10 bilambi
Garnish
A lemon wedge
Suggested Accompaniment
A heap of plain rice
Method
1. Clean prawns and marinate with salt and turmeric powder
2. Roast coriander seeds, chilies and black peppercorn. Grind with coconut and onion, to a fine paste, adding little water as necessary.
3. Heat oil in a saucepan. Add onion and turmeric power. Add bilmbi and 2 tbsp. water. Cover and cook for 5 minutes.
4. Add marinated prawns and finely ground masala.
5. Add water depending on the desired consistency.
6. Bring to boil. Switch gas to low. Let it simmer for 10 minutes.
7. Cover and let it stand for at least 10 minutes before serving.
Note -
1. Serve this curry with plain rice and a lemon wedge.
Print Page
Thursday, January 29, 2015
Bilimbi Gojju
I spotted "Irumban Puli" in the frozen vegetable section of my local Indian stores. Though these specific words meant nothing to me, the picture on the packet screamed "Bilimbi"! So I had to buy it. :-)
The first simple recipe that I tried, was by making chutney using coconut and garlic. It was more or less similar to the Ambule Gojju.
Bilimbi Gojju
Bilimbi Chutney
Ingredients
5-6 Bilimbi/
1/2 cup coconut
4-5 garlic cloves
salt to taste
7-8 byadgi chilies (Use more or less per personal preference)
Garnish
Few drops of coconut oil
Method
1. Steam bilimbi in a spoonful of water. Let it cool down.
2. Grind coarsely with all the remaining ingredients.
3. Drizzle coconut oil as a garnish.
Note -
1. This gojju should be hot and should have a strong garlicky flavor.
2. Serve this "chutney" as a side dish with your meal or an accompaniment with dosa/idli.
Print Page
Friday, January 23, 2015
Loshni Vodi
Almost all parts of India has their own solar cuisine. Today's delicacy is from South Canara Cuisine called "Losni Vodi". My aunt sent over these "vodies" or sun-dried papadums which have a strong garlicky note. These are meant to be deep fried and eaten as a fritter with your daily meal of sheeth/rice, daali tauy/daal, some freshly made upkaris and nonche/pickle.
Authenticity may scoff at my attempts to reduce the calorie intake. Yes. I didn't deep fry them. I microwaved them!
Print Page
Sunday, January 18, 2015
Sukil Sungtha Upkari - Sundried Prawns
Sukil Sungath or Suki Kolumbi is sundried prawns. Honestly speaking, I don't care much for them but being a food blogger, I have taken upon this responsibility to capture the food cooked in my family. Sukil Sungtha Upkari is a delicacy and is devoured especially during rainy season. My family members refrain from eating any seafood during monsoon. It's said that this is the breeding season and over fishing is avoided to maintain the balance in the ecosystem. This is also the time, when seafood loving Mumbaikars take out their stash of sundried fish from the pantry and cook some delicacies.
Sukil Sungtha Upkari
Sundried Shrimp Stir Fry
Ingredients
100 gm. or about 1 cup dry small shrimp, cleaned
salt to taste (Adjust if needed)
2 tsp. chili powder
1/2 tsp. tamarind pulp
Tempering
2 tbsp. coconut oil
1 cup finely chopped onion
2 red chilies, halved
A pinch of turmeric powder
Garnish
1/4 cup freshly scraped coconut
2 tbsp. minced cilantro
Method
1. Soak cleaned , sun dried shrimp in water for 15 minutes. Drain.
2. Heat oil - preferably coconut oil in a saucepan. Add onions and red chilies with turmeric powder. Sauté till onion is soft.
3. Add drained fish and chili powder.
4. Sauté for 5 minutes.
5. Add 1/4 cup water, salt - only if needed and tamarind paste.
6. Cover and let it cook for 15 minutes.
7. Garnish with coconut and cilantro. Mix. Switch off the gas.
8. Let it stand with lid covered for 10 minutes.
9. Serve with chapatti or rice bhakri.
Note-
1. Sun dried shrimp already has salt in it. That's the reason you soak it to remove any excess salt. Adjust salt to this curry only on the need basis.
Print Page
Subscribe to:
Posts (Atom)