Wednesday, July 31, 2013

Avocado Paratha


I had come across this unique flatbread at Indira's Mahanandi during my pre-blogging days. She had come across this recipe at GM's "The Spice is right".  I was really impressed with this fusion cooking. Since then, I have been making my version of Avocado Parathas.

Avocado Paratha - (Count 7 - 9)
Avocado Flatbread
Ingredients

Mash
1 ripe avocado, peeled & pitted
salt to taste
1/2 tsp cumin powder
1/2 tsp turmeric powder
1/2 tsp chile powder
1 clove garlic, peeled & grated
3 tbsp minced cilantro
1 tsp lemon juice

3/4 - 1 cup wheat flour
3 tbsp - 1/4 cup water

Oil  - as needed for roasting
Rice flour or wheat flour - as needed, for dredging

Method
1. Mash avocado so there are no lumps. Mix in salt, cumin powder, turmeric powder, chile powder, grated garlic, cilantro and lemon juice.
2. Add wheat flour and mix together. Do not add water initially. Add water as needed to knead into a smooth dough ball.
3. Make 7 - 9 uniform balls.
4. Roll into thick parathas/flabtbreads dredging into rice or wheat flour as needed.
5. Heat a pan or griddle. Roast each flatbread, adding very little oil for roasting.
6. Cover in a clean, kitchen towel - till ready to serve.

Note -
1. Above proportion gives me about 7 - 9 parathas. This count will vary depending on the diameter of the parathas.

Credits
The Spice is Right
&
Mahanandi


Print Page

Monday, July 29, 2013

Vegetable Khichadi


Vegetable Khichdi with Tomatochi Koshimbeer
 
Khichadi is one of the most ubiquitous comfort foods, that is prepared in Indian kitchens and though the recipe asks for basic daal and rice with some spices here and there, the exact recipe differs even within my own family. Today, I am sharing my aunt's version of khichdi.
 
Vegetable Khichadi
Rice, Daal and vegetables
Ingredients
1 cup Basmati rice, rinsed
1/2 cup yellow moong daal, rinsed
1/2 cup green moong daal, rinsed
 
2 smallish potatoes, peeled & diced
A handful of green peas, fresh or frozen
 
Salt to taste
1/2 tsp mild chili powder
1 tbsp goda masala - preferably homemade or good quality
 
Tempering
1 tbsp oil
1/2 tsp mustard seeds
1/2 tsp cumin seeds
1/4 tsp asafoetida
1/2 tsp turmeric powder
1 spring curry leaves, torn
1 medium onion, finely chopped - approx. 1/2 cup
 
Garnish 1
1 tbsp clarified butter/toop/ghee
 
Garnish 2
1/4 cup freshly scraped coconut
2 tbsp minced cilantro
 
Suggested Accompaniments
Papads
 
Method
1. Rinse rice and two types of daals. Soak in water for about 1/2 hour.
2. Heat oil in a heavy bottomed saucepan.
3. Add all the ingredients till curry leaves. Saute for 1 minute. As they sizzle, add onion. Saute till onion is translucent.
4. Add goda masala and saute for another minute.
5. Add potatoes. Saute for about 2 minutes.
6. Drain daal and rice completely. Add to the above mixture. Saute for 2 minutes.
7. Add 4 1/2 - 5 cups warm water, salt to taste, chili powder and green peas.
8.  Bring water to boil. Switch gas to medium. Cover and let it cook for about 15 minutes, carefully checking once in a while, making sure that it is not sticking to the bottom of the pan.
9. Switch the gas to the lowest and let it cook for another 10-15 minutes.
10. Check for doneness. Once cooked, drizzle ghee/toop/clarified butter around the khichdi.
11. Switch off the gas. Keep covered for at least 10 - 12 minutes.
12. Garnish with coconut and cilantro. Serve hot along with the suggested accompaniments.
 
Note -
1. If you prefer your khichdi to have softer, soupy consistency, increase the amount of water. On the other hand, if you prefer each grain to be separate, then use 4 1/4 cups water.
2. Please note that, we do not use whole moong for this recipe but unpeeled/unhusked green moong daal is used.


Print Page

Sunday, July 28, 2013

Goan Pomfret Rechado


My friend, Pooja V had sent me a packet of "Rechado" paste from Goa. She also sent a note that this is pronounced as "Reshado" which was very helpful to me!;-)  I made this delicious rechado and noted down the ingredients from the packet. Later, I tasted this pomfret Rechado again at "Viva Goa" in San Francisco. After that I wanted to try it myself.  So this is just my version based on Pooja V's Rechado packet and Viva Goa's preparation.

Pomfret Rechado
Goan Pan Fried Pomfret
Ingredients
1 medium pomfret
salt to taste
1/2 tsp turmeric powder
1 tsp lemon juice

Oil for frying

Grind
1 tbsp paprika
1/2 tbsp Sriracha chili-garlic paste
1 tbsp malt vinegar
1/2 tsp garam masala
A pinch of clove powder
A pinch of cinnamon powder
1/2 tsp cumin powder
1 1/2 tbsp ginger-garlic paste, preferably freshly made


Method
1. Get the pomfret cleaned from you fish monger such that it it not cut into steaks or fillets but it remains whole for stuffing. Rinse under running water. Pat try. Add salt, turmeric and lemon juice. Set aside till ready to use.
2. Grind all the ingredients to make a thick paste. Do not use water.
3. Apply the ground paste inside and outside to the pomfret.
4. Heat a cast iron pan. Add oil.
5. Place the pomfret on the pan.
6. Fry on low flame till it is crispy on both sides. Add oil as needed.
7. Serve with salad of your choice.

Note -
1. The original recipe contains Kashmiri red chilies. I have substituted Paprika for color and Sriracha for some heat.


Print Page

Saturday, July 27, 2013

Rajgiryachi Bhaaji


I plucked fresh Rajgira from my container garden and I made this simple stir fry.

Rajgiryachi Bhaaji
राजगिऱ्याची  भाजी 
Amaranth Leaves Stir Fry
Ingredients
1 bunch Rajgira, cleaned,rinsed, roughly chopped
salt to taste
1/2 tsp sugar or to taste
1 tbsp unsalted, roasted peanuts, powdered/daaNyache KooT

Tempering
2 tsp oil
1/3 cup chopped onion
4-5 cloves of garlic, peeled & smashed
1/4 tsp turmeric powder
1-2 green chilies, slit
1-2 red chilies, halved

Method
1. Rinse rajgira in several changes of water. Remove all the impurities/soil. Chop roughly.
2. Heat oil in a saucepan. Add garlic cloves. Saute till they are a shade darker.
3. Now add onion, chilies and turmeric powder. Saute till onion is soft.
4. Add chopped rajgira. Mix. Sprinkle few drops of water. Cover with a lid. Pour some water on the lid. Let it cook till rajgira is soft.
5. Now add salt, sugar and peanut powder. Saute till it comes together.
6. Let all the water evaporate.

Note-
1. If the stems are fresh, you can chop them with leaves.
2. Always add salt after the leafy greens are cooked as they always wilt to a smaller quantity after getting cooked.

Rajgira


Print Page

Thursday, July 25, 2013

Ratalyachya Pananchi Paatal Bhaaji - Sweet Potato Leaves Curry


During one of my Farmers' Market visits, I discovered "Sweet Potato Leaves" for sale. I didn't even know that they can be eaten so I didn't buy them. But I told my mom about them over the phone and inquired if she had ever heard about these leaves as edible. Mom reminded me that my childhood favorite Marathi book - Shyamchi Aai - had a reference about Sweet Potato Leaves Bhaaji. I remembered the story perfectly well but I had forgotten that it was the same "saltless" bhaaji, Shyam's mom had prepared which was devoured by the entire family without a single complaint. Just because Mother's hard work should never be scorned by throwing tantrums - that's what Shyam's dad teaches the whole family.

"Shyamchi Aai" - is a classic Marathi book written by Sane Guruji. It was also made into a National Award winning movie, which I haven't seen.  My mom used to read it to me when I was young. Shyam or Sane Guruji himself narrates the story about his family and the main character is his mother. Soft yet strict, Shyamchi aai and his entire family make a beautiful impact on the impressionable, young and mature, old minds alike. Shyam's father, who never belittles food or mother's hard work, actually compliments the food in spite of mother forgetting to add salt and calling it "Raajmanya" - worthy for kings. Mother who tastes the food after everyone was served, realizes and blames herself, since she forgets to add the salt. Simple yet touching, Shyamchi aai is not just a book of childhood memories but it's a treasure of family values - sanskars and simple life and upbringing.

Once my mom reminded me the story, I wanted to make that bhaaji. Of course, I didn't have any recipe to follow. Mom suggested to make "Paatal Bhaaji" just like we make Aluchi paatal bhaaji. She was absolutely right. This bhaaji tasted delicious. Sweet potato leaves don't  have a distinct taste/flavor of their own. They get soft after cooking.  This recipe was the perfect choice.

Ratlaychya Paananchi paatal Bhaaji
रताळ्याच्या पानांची पातळ भाजी 
Sweet Potato leaves Curry
Ingredients
1 bunch sweet potato leaves, cleaned, roughly chopped
2 tbsp raw, unslated peanuts, soaked in water for 2 hours
2 tbsp chana daal, soaked in water for 2 hours
2-3 kokums
salt to taste
1/2 tbsp jaggery
3-4 green chilies, slit

Thickener
1 tbsp besan/chickpea flour + 1/2 cup water

Tempering 1
2 tsp oil
1/2 tsp mustard seeds
1/2 tsp turmeric powder
1/4 tsp asafoetida
3-4 green chilies, slit

Tempering 2 (Right before serving)
1 tbsp oil
1/2 tsp mustard seeds

Method
0. Clean sweet potato leaves under running water. Pluck fresh leaves. Shred them roughly. If stems are good, chop them as well otherwise discard them.
A bunch of sweet potato leaves

1. Pressure cook shredded sweet potato leaves and peanut/chana daal in separate containers using adequate water. Mash cooked leaves with a ravi/butter churner. Do not mash peanuts/chana daal mixture.
2. Heat oil in a saucepan. Add tempering1.
3. As it sizzles, add mashed leaves, peanut and chana daal. Add more water.
4. Add salt, jaggery and rinsed kokum.
5. As curry comes to boil, add besan + water as a thickener for the curry.
6. Simmer on a low flame.
7. Just before serving, heat oil in a small saucepan - fodNichi paLi. Add mustard seeds. As they start spluttering, drizzle this tempered oil over each individual serving of curry.

Note -
1. Chickpea flour and water mixture acts as a thickener that gives the right consistency to this curry. If you omit it, the curry will be very watery.

Sweet Potato Leaves from a farm


Print Page

Tuesday, July 23, 2013

Daal Kaarle - Bittergourd Daal (1)


Sometimes, my mom combines vegetables with daal, thus sneaking in more nutrients into the daily daal. Whichever vegetable you use, gives its own flavor to the daal.

Daal Kaarle
डाळ  कारले 
Bittergourd with daily daal
Ingredients
1 cup toor daal
3 small bittergourds, scraped, deseeded, chopped
salt to taste
1 tsp chile powder
1/2 tsp tamarind paste
1 tsp jaggery or to taste

Tempering
1 tbsp oil
1/2 tsp mustard seeds.
1/4 tsp asafoetida
1/2 tsp turmeric powder
2 sprigs curry leaves
1/3 cup finely chopped onion
2 1/2 tsp goda masala

Method
1. Pressure cook toor daal and bittergourds together, adding adequate water. Set aside. Do not mash daal.
2. Heat oil in s heavy bottomed saucepan. Add mustard seeds, asafoetida, turmeric powder and curry leaves. As they start to splutter, add onion. Saute for 5 minutes. Now, add goda masala. Saute on a medium flame, taking care not to let goda masala burn.
3. Now add daal along with bittergourds. Add 1 cup water. 
4. Add all the remaining ingredients one after the other. Bring to boil on a medium-high flame.
5. Adjust water according to the desired consistency. Switch gas to low. Let it simmer for 10 minutes.

Note -
1. This daal should be on the thicker side.
2. Do not mash the daal completely.


Print Page

Sunday, July 21, 2013

Rose Watermelon Granita


I have seen or read about watermelon granita in the various food magazines. Watermelon and simple syrup are processed and frozen for about an hour. It is then scraped using a fork and re-frozen again. This scraped watermelon ice is served which goes by the name "Watermelon Granita". I have seen some variations like addition of mint, lime or even alcohol.

My version is inspired by my MIL's watermelon-rose flavored mocktails.

Rose Watermelon Granita
Ingredients
3 cups juicy red watermelon chunks
1/2 cup rose syrup such as Rooh Afza or Dabur

Method
1. Process watermelon chunks with rose syrup in a blender or food processor. Do not add any water.
2. Pour in a freezer safe glass baking pan.
3. Freeze for about 45 minutes to 1 hour.
4. Scrape the semi-frozen "watermelon ice" with a fork.
5. Re-freeze again for another hour or so.

6. Scrape again with the fork.
7. Serve in a bowl.

Note -
1. Depending on the sweetness of watermelon, you may need to change the quantity of rose syrup.


Print Page

Friday, July 19, 2013

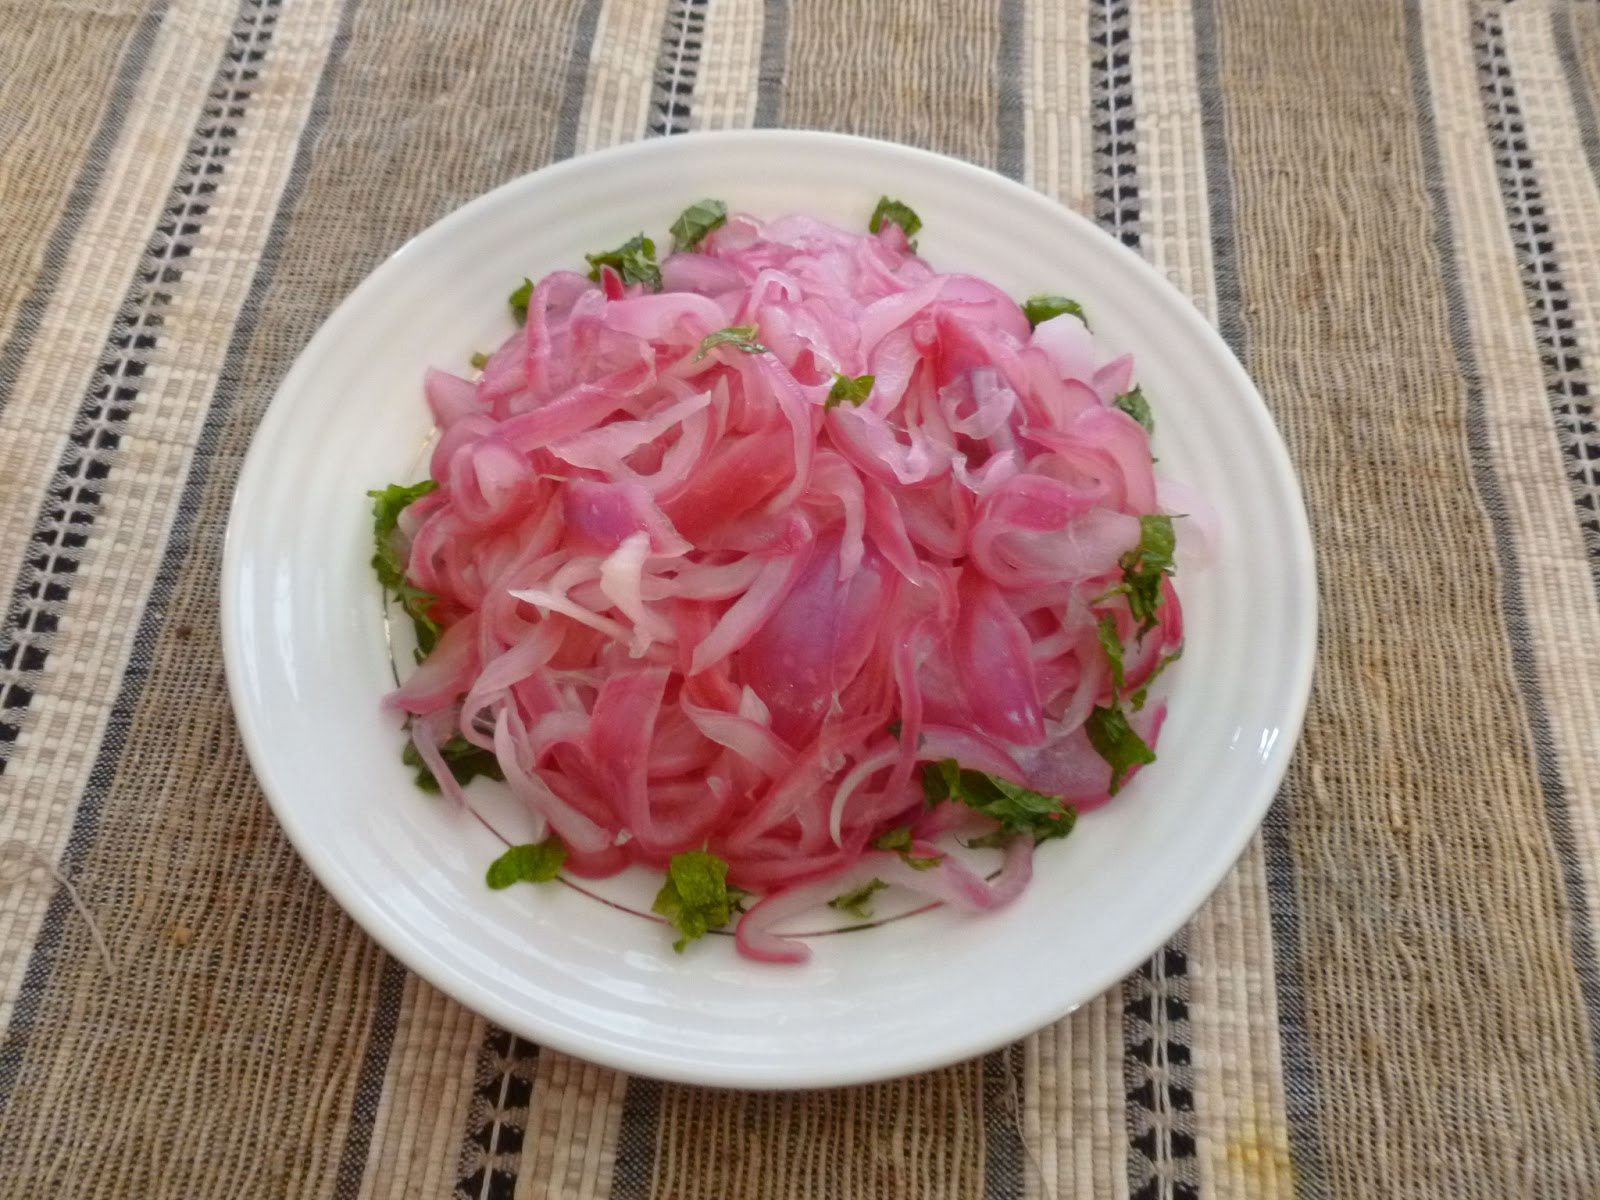
Sirkewale Pyaz(1) - Pickled onions


I learnt this recipe from my Punjabi friend. She told me that this is how they serve raw onions in her family. Soaking raw onions in white vinegar prevents that pungent odor of raw onions and brings out the prettiest hue of red/purple/pink colors.

This is more like a salad than a pickle and needs to be consumed within a day.

Sirkewale Pyaz(1)
Pickled Onions
Ingredients
1 big red/purple onion, peeled and sliced thinly to make 2 cups slices
1/2 cup white distilled vinegar
1/2 tsp salt

Garnish
1 tbsp fresh mint leaves, minced

Suggested Accompaniment
Any spicy curry

Method
1. Peel and slice onion thinly. Make sure that onion slices measure up to about 2 cups.
2. Place onions in a wide glass or ceramic bowl. Add salt and vinegar. Mix.
3. Cover and marinate for at least 4-5 hours. Stir from time to time so that all the onion slices get soaked up in the vinegar uniformly.
4. Right before serving, squeeze the onion slices in batches so all the moisture is left out.
5. Now discard the vinegar solution from the bowl. Rinse it and add 2 cups fresh water. Put drained onions back to the water. Give a quick rinse. Drain again all the moisture by squeezing the onion slices tightly.
6. Spread the onion slices on a serving platter. They would now have a pretty pink shade.
7. Sprinkle minced fresh mint around.

Note -
1. This is more like a salad than a pickle and needs to be consumed within a day.
2. This "pickle" has no shelf life. Please keep any leftovers in the refrigerator and consume within a day.


Print Page

Wednesday, July 17, 2013

Avocado Pesto or Basil Guacamole?


Avocado Pesto Garnish for the vegetable soup


I don't know what to call this creation of mine? My basil plant was eager to share its bounty. I had just plucked some fresh garlic. There was a lone, very ripe avocado that I had to use that day. I came up with this mixture. Now, I am not sure whether I should call it Avocado Pesto or Basil Guacamole?;-)

Avocado Pesto or Basil Guacamole
Ingredients
1/3 cup fresh basil leaves, roughly chopped
1 avocado, peeled/pitted, pulp
3-4 garlic cloves, fresh or usual, roughly chopped
salt to taste
1/2 tsp lime zest
1 tbsp lime juice, freshly squeezed (or to taste)

Method
1. Add all the chopped ingredients in a small food processor.
2. Process till it is mashed up.
3. Add all the remaining ingredients. Process again till it is smooth.
4. Serve immediately.

Note-
1. I serve this pesto as a topping on the soup, spread on a bread or even as a chutney with bhakri.
2. Since this recipe does not contain oil and avocado discolors quickly, use this pesto/guacamole same day.


Avocado Pesto/Basil Guacamole posing as a chutney with bhakri!;-)
Print Page

Sunday, July 14, 2013

Chia Seeds Icecream


Just a few years ago, I used to associate chia seeds as the seeds used for making those cute chia pets. and now, all of a sudden, they are considered as the nutritional powerhouse. These seeds plump up after soaking in the water. They remind me of our "subja" or "takmaria" seeds. and thus I decided to make my Chia seeds icecream on the lines of Falooda.

Chia Seeds "Falooda" Icecream
Ingredients
2 cups whole/full fat milk - preferably organic
1 cup heavy cream

Whisk till no lumps
2 tbsp corn starch + 1/2 cup milk

1 1/2 tbsp chia seeds (or up to 1/4 cup)
3 tbsp Rooh Afza or Dabur Rose Syrup
1/2 - 3/4 cup sweetened condensed milk

Method
1. Soak chia seeds in the water till they plump up.
2. Mix full fat milk, heavy cream and condensed milk on a medium flame. Add corn starch mixture, whisking till there are no lumps. Switch off the gas. Let it cool down completely.
3. Add Rose syrup. Adjust for more sugar if needed.
4. Add soaked, drained chia seeds. Pour in a freezer safe glass pan. Freeze in the refrigerator till the mixture thickens.

5. Scoop out  & enjoy!

Note -
1. Rooh Afza or Dabur Rose Syrup is available at the local Indian stores.
2. You can increase the amount of Chia seeds in this recipe per your liking.


Chia Seeds

Print Page

Saturday, July 13, 2013

Mint - Banana Peppers Chutney


I created this chutney by substituting the ingredients available in and around my kitchen garden and pantry.

Mint-Banana Peppers Chutney
Ingredients
1 bunch of mint
4-5 banana peppers (or depending on the desired taste)
salt to taste
1/2 tsp sugar
2 tbsp lemon juice (or per taste)
2 cloves garlic
1/2" ginger
1 cup fresh coconut

Roast in a spoonful of oil
1 tsp oil
1 1/2 tbsp white urad daal

Suggested Accompaniment
Idli
or
Dosa

Method
1. Roast urad daal in a spoonful of oil till it is darker.
2. Grind all the ingredients together adding water as necessary.
3. Serve with idlies.

Note-
1. Banana peppers are usually mild.


Print Page

Thursday, July 11, 2013

Mexican Fiesta Bowl (Baked)


Mexican Fiesta bowls are like "katories" that we use for the katori chaat. But they are big enough to hold the entire salad. Deep Fried salad bowls are readily available on the shelves of the supermarket but if you have these baking bowls, then you can easily bake tortillas or chapaties and mold them into these bowl shapes. I even use these bowls to serve Indian Chaat items like Bhel

Mexican Fiesta Bowl
Ingredients
4 Wheat or White Tortilla
2 baking bowls

Oil spray such as Pam

1 recipe Black beans
2 cups Shredded iceberg lettuce
1/4 cup Finely minced onion
1/4 cup Finely minced tomatoes
2 tbsp Finely minced cilantro
1 Avocado, pitted and chopped


Garnish
A spoonful of Salsa per bowl
Shredded Mexican cheese(optional)
A dollop of sour cream or plain Greek yogurt(Optional)

Method
1. Follow this recipe to make black beans. Let them cool down.
2. Preheat oven 400F. Spray oil over the baking bowls. Prick tortillas with a fork so they don't puff up during baking.

3. Line the tortillas around the baking bowls and bake for about 10 minutes or so till they look brown and crispy.

4. Layer the tortilla bowl with shredded lettuce, black beans, onion, tomatoes, cilantro, avocado.
5. Garnish with salsa, shredded Mexican cheese and a dollop of sour cream or yogurt if using.

Note -
1. You can serve any salad or even chaat in these tortilla bowls. They are baked and not fried.
2. Serve immediately after stuffing with lettuce and beans else they will turn very soggy.


Print Page

Tuesday, July 9, 2013

Superquick Vegetable Frankie

 
These days, working from home is the norm everywhere. Sometimes, mostly on Fridays, both hubby and I work from home. Mostly we finish up previous day's leftovers for lunch on such days. But every once in a while, we come across a crisis of no leftovers. One such fateful day, this "wrap" was created. It was really no biggie but it came together pretty well so thought of sharing it here.


Superquick Vegetable Frankie
Vegetable wrap - Mumbai style
Ingredients
2 Whole Foods Whole Wheat Tortilla
2 Chickpea Spinach burgers
 
Vegetables
4 leaves of Boston Bib or any lettuce
1 small tomato, chopped
1 small onion, chopped
 
Garnish
A pinch of Amchoor powder or few drops of freshly squeezed lemon
A generous pinch of Chaat Masala
A quick squirt of tomato ketchup
Few drops of hot sauce such as Sriracha
 
Method
1. Heat whole wheat tortillas on cast iron pan on a low flame. They should have brown spots but should not be too crisp to wrap.
2. Heat up veggie burgers per packet instructions. Slice them to bite sized pieces.
3. Place one tortilla on a clean and dry surface. Line up lettuce leaves on the tortilla.
4. Place veggie burgers, chopped tomatoes, onions, cilantro.
5. Garnish with amchoor powder or lemon juice, chaat masala, ketchup and hot sauce - if using.
6. Wrap the tortilla, using toothpicks if necessary.
 
Note -
1. If you have tamarind-date chutney in thr fridge, bring it on!
2. I love Whole Foods whole wheat tortilla. For some reason, I am not too happy with their "Organic Whole Wheat tortilla" as I have noticed that the tortillas are stuck to each other. But their "Whole Wheat Tortilla" without "Organic" prefix is the one I generally use.
3. I used Veggi PatchSpinach chickpea Burger , generally available at Costco.


Sunday, July 7, 2013

Oven Roasted American Sweet Corn


Summer is in full swing here. That also means visiting country fairs and sampling some good, old fair food. You get to see many old classics like freshly squeezed lemonades, kettle corn, snow cones, ribbon fries and of course roasted corn. I wanted to try the roasted corn. The old lady, handed over a corn, still in its husks. She then carefully pulled down the husks. I wasn't sure if it was even roasted. But people were devouring it. Then I realized that the corn was baked in the oven. So it didn't have those trademark black spots that roasting on the charcoals give. The popular choice was dunking the corn in the butter which I am not very fond of. So I sprinkled my corn with salt and cayenne pepper.

Now, this is the season to enjoy corn. When I picked the corn from the Farmers Market, I accidentally pulled all the husks. So I wrapped my corn on cobs with aluminum foil. I followed Tyler Florence's recipe for Oven Baked Corn. It was very easy.

Oven Roasted American Sweet Corn
Ingredients
4 or 8 American Sweet Corn, wrap in Aluminum foil

Garnish (Choose any or all of your choice)
Salt
Red Pepper/Chile powder
Lemon Wedges

Method
1. Preheat oven to 350 F
2. Clean and wash the corns.
3. Wrap each corn in an Aluminum foil tightly.

4. Bake for 30 minutes.
5. Serve immediately along with garnish of your choice. [It will be very hot!]

Note -
1. Many prefer eating this corn, with ample amount of butter.

Credits
Tyler Florence


Print Page

Saturday, July 6, 2013

Chicago Style Deep Dish Pizza


Chicago style deep dish pizza is every cheese pizza lovers' dream come true! It's more like a pie than a pizza. There are various pizza crusts in the United States. NY style pizza has a thin crust, St. Louis style pizza has a cracker like crust and Chicago style pizza has a thick crust with lots of stuffing and cheese and another layer of crust on top.

I followed my usual Bob's Red Mill recipe for making pizza crust but I made 2 stuffed pizzas using a pie plate. I made my own veggie stuffing. This recipe is entirely my experiment so there are no claims for authenticity. It is based on my take on the famous Chicago style Deep Dish Pizza that we tasted in Chicago. This pizza - unlike my version below - had a thin layer of tomato paste on the top crust along with some sliced tomatoes and black olives. Also, it was lot deeper than mine![Scroll below to see the picture of the famous Chicago style pizza right from Chicago!]

Chicago Style Deep Dish Pizza
Ingredients
Pizza Dough

For the stuffing
1 tbsp oil
1/3 cup finely chopped red onion
2-3 cloves of garlic, minced
1/2 tsp turmeric powder (optional)
1/3 cup finely chopped bell pepper
9-10 white button mushrooms, thinly sliced
1 cup shredded fresh spinach
 pizza sauce in a jar [I used classico 14oz jar]
1 tsp Italian seasoning
1 tsp shredded fresh basil leaves
salt to taste
Shredded Mozzarella cheese, as needed
or
Shredded Pizza cheese, as needed

Method
1. Proceed to make pizza dough as described here. Cover and let it rise. Punch the dough down and cut it into 4 parts. Cover and set aside.
2. Meanwhile, heat olive oil in a saucepan. Saute garlic and onion till they are soft. Add turmeric powder - if using
3. Add bell peppers. Saute for about 5 minutes.
4. Add mushroom & spinach. Saute for 10 minutes.
5. Add Italian seasoning, pizza sauce and salt to taste - remember that the pizza sauce already has salt.
6. Simmer the sauce on a low flame till it thickens up.

7. Add basil leaves. Let it cool down completely before using
8. Spray some oil onto a pie plate. Preheat oven 350F
9.  Roll one ball of dough so its diameter is larger than that of the pie plate. Make sure that the remaining balls are covered so they do not dry up.
10. Place the rolled dough onto the pie plate, taking care to cover the sides of the pie plate.
11. Spread some cheese on top.
12. Now spread about half of the stuffing. Spread more cheese on top. Make sure that the stuffing and cheese do not overcrowd the sides of the pie plate.

13. Roll another dough ball. Plate it carefully on the stuffing.
14. Pinch the rolled dough around the circumference so the stuffing is completely enclosed.

15. Prick some holes in the center of the pizza top so there is some way the steam escapes.
16. Bake in preheated oven for about 30 - 45 minutes. Keep a close eye after 30 minutes.
17. Take out pizza. Let it cool down a bit before cutting into "pie" slices using a sharp knife.

18. Serve immediately.
19. Repeat steps 9 - 18 for the second pizza "pie".

Note -
1. If you prefer a spicier version, you could add some crushed red peppers into the stuffing.
2.  Turmeric powder is obviously an Indian touch, which is added for its antioxidant properties. It is completely optional.
3. This recipe gives 2 deep dish pizzas of usual pie size diameter.
4. For authentic flavor, spread some pizza sauce without vegetables on the pizza pie after it comes out of the oven. Place some sliced tomatoes and black olives before serving.
5. In order to get a glaze for the crust, whisk 1 egg white and 1 tbsp water. Paint it on the top of the pizza pie using a pastry brush, before baking.
Chicago Style Deep Dish veggie Pizza from Chicago
 
Credits
Giovanni's Chicago Style Pizza


Print Page

Thursday, July 4, 2013

Razzleberry Ice Cream


We passed through the beach town of "Pompano Beach" during our road trip earlier this year. I discovered that "Pompano" is a pomfret like fish that is found in the Atlantic ocean and hence the town gets this name. Being a huge seafood lover, I loved this town for its association with pomfret!!;-) I really would have loved to check out if they serve their namesake pompano in any of the restaurants. Unfortunately, it was about 4 PM and we didn't have an iota of hunger  to eat up a meal. But a dollop of ice cream in hot, sweltering heat would not have hurt!

We had heard about this place called "Razzleberry". I was curious about this "Razzleberry". Is this really a berry that I haven't heard of before? Well, the owner explained that razzleberry is a mixture of raspberries and blackberries together. Needless to say, the ice cream tasted divine. All their flavors were homemade and delicious.

After coming home, I had to make "Razzleberry Ice cream". I used Hamilton Beach's recipe for "Raspberry" ice cream and substituted 1 cup raspberries and 1/2 cup blackberries for 1 1/2 cup raspberries. I really loved that beautiful pink-purple color.

Razzleberry Ice cream
Adapted from Hamilton Beach
Ingredients
1 cup raspberries, frozen
1/2 cup blackberries, frozen
2 tsp lemon juice

1 cup sugar
1 cup full Fat milk
1 cup heavy cream

Method
1. Thaw the berries lightly. Crush them using blender.
2. Stir in all the remaining ingredients. I used blender for this too.
3. Pour in your ice-cream maker.


Ice Cream Maker is churning the razzleberry mixture
 
4. Churn for about 30 minutes.
5. Pour in a freezer safe container.
6. Freeze for about 2 hours or till mixture is set.
7. Serve and enjoy!

Note -
1. The recipe suggests straining the berries pulp to get rid of the seeds. But I like to keep them.

Credits
http://www.hamiltonbeach.com/raspberry-ice-cream.html

&

RazzleBerry's Ice Cream
Address: 3412 E Atlantic Blvd, Pompano Beach, FL 33062


Print Page

Monday, July 1, 2013

Perennial Turmeric


Perennial Turmeric

After successfully growing turmeric in my container garden for several years, I planted some fresh turmeric roots in a small patch in our backyard. I loved those beautiful leaves that I used for making various GSB delicacies. But I didn't know that this turmeric would come back to life in spring. This is the second year now, when those dormant and almost dead turmeric plants during winter, bloom back.

Here in the United States, plants are divided into two categories - Perennial and Annual. These categories vary based on the geographic zone/location and corresponding weather conditions. For the tropical zones where it never snows, most of the plants are perennial. But for the rest, some plants die during winter and never come back so they are annuals and those which go dormant but come back are perennials. I never thought that our very own, tropical turmeric would survive the harsh winter and promptly start growing once weather has improved.

Print Page