Sunday, June 30, 2013

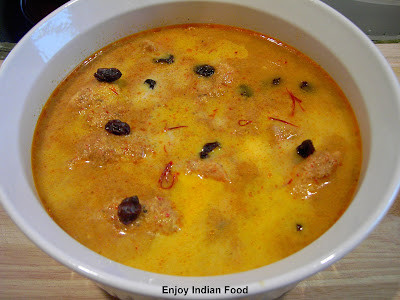
Chicken Mughlai


I made my first "Mughlai Chicken" in my 12th vacation. I had followed a recipe from a magazine. My cousin had happened to come over for lunch. This cousin was known to be a meat connoisseur (actually a rarest species in my family, who could eat chicken and mutton  any time of the day) so I was dying to know his constructive feedback. Though he gave me very positive feedback, I knew that he was hesitant and wasn't telling me the entire truth. I asked him what's the thing that he's holding back to which he replied candidly that though the curry was very good to taste, it was too "deep brown"  to be called chicken mughlai. It should have been creamier and whiter per the standards used in the restaurant kitchens".

Since that day, I am on the mission of lightening this classic dish. So if you see the same title on my blog with a different version number, you would probably understand why.

Chicken Mughlai
Chicken Curry Mughlai style
Ingredients
Marinate
1 1/2 lb boneless, skinless organic chicken, cut into bite sized pieces
1/2 tsp salt
1/2 cup Greek yogurt
2 tsp ginger-garlic paste
A pinch of nutmeg powder - preferably fresh

Soak
*20-21 almonds in 1/4 cup milk for 2-3 hours, peeled

Grind to a fine paste
2 cups boiled onion paste (approx 1 or 2 raw onions according to American standards)
*Drained almonds along with milk (discard peels)
1/2 tsp shahjire
2-3 cloves
1" cinnamon
1 tbsp kashmiri chili powder or paprika (only for color)
2 green cardamoms
4-5 black peppercorns
7-8 fresh mint leaves(optional)

Tempering
1 Tbsp ghee/clarified butter
2 bay leaves

Garnish 1
1 tbsp Ghee/clarified butter
1 tbsp raisins

Garnish 2
1/2 cup heavy cream
1/2 tsp Mughlai Garam Masala

Garnish 3 (optional)
2 tbsp warm milk
few strands of saffron

Method
1. Clean chicken and marinate with yogurt, salt, nutmeg powder and ginger garlic paste. Cover and set it aside in the fridge till ready to use.
2. Pressure cook peeled onion. Grind to paste.
3. Soak almonds in milk for about 3-4 hours. Peel and discard skins.
4. Grind boiled onion paste, soaked almonds with all the other spices using milk for soaking almonds. Use more milk if necessary.
5. Heat ghee in a pressure cooker or a heavy bottomed saucepan. Add bay leaves.
6. As they sizzle, add marinated chicken along with the marinade. Saute for about 10 minutes.
7. Add ground masala paste. Mostly chicken would have enough moisture for pressure cooking. If not, add 1/2 cup water. Pressure cook. If not using pressure cooker, let the chicken cook by covering the saucepan with a lid.
8. Let the pressure drop by its own. Simmer the curry till it is thicker than before. Adjust salt. Make sure that the gas is on low flame.
9. In a small saucepan, melt ghee. Add raisins and saute till they are plump. Add the plump raisins to the simmering curry.
10. Now, add heavy cream  and mughlai garam masala. Continue simmering on a low flame.
11. If using saffron, place saffron threads on a stainless steel spoon. Hold it over a gas flame for few seconds. Dip in a warm milk.
12. When serving the chicken curry, you can drizzle this saffron milk for an additional garnish. But this may make the curry yellower!

Note -
1. Cashews can be substituted for almonds.
2. You can vary the consistency of the curry depending on the type of bread you are serving. e.g. if you are serving this curry along with Rumali Roti, let the consistency be thick. But if you are serving it with pav or French boule, then you could make the curry with thin consistency to soak up the bread.


Saturday, June 29, 2013

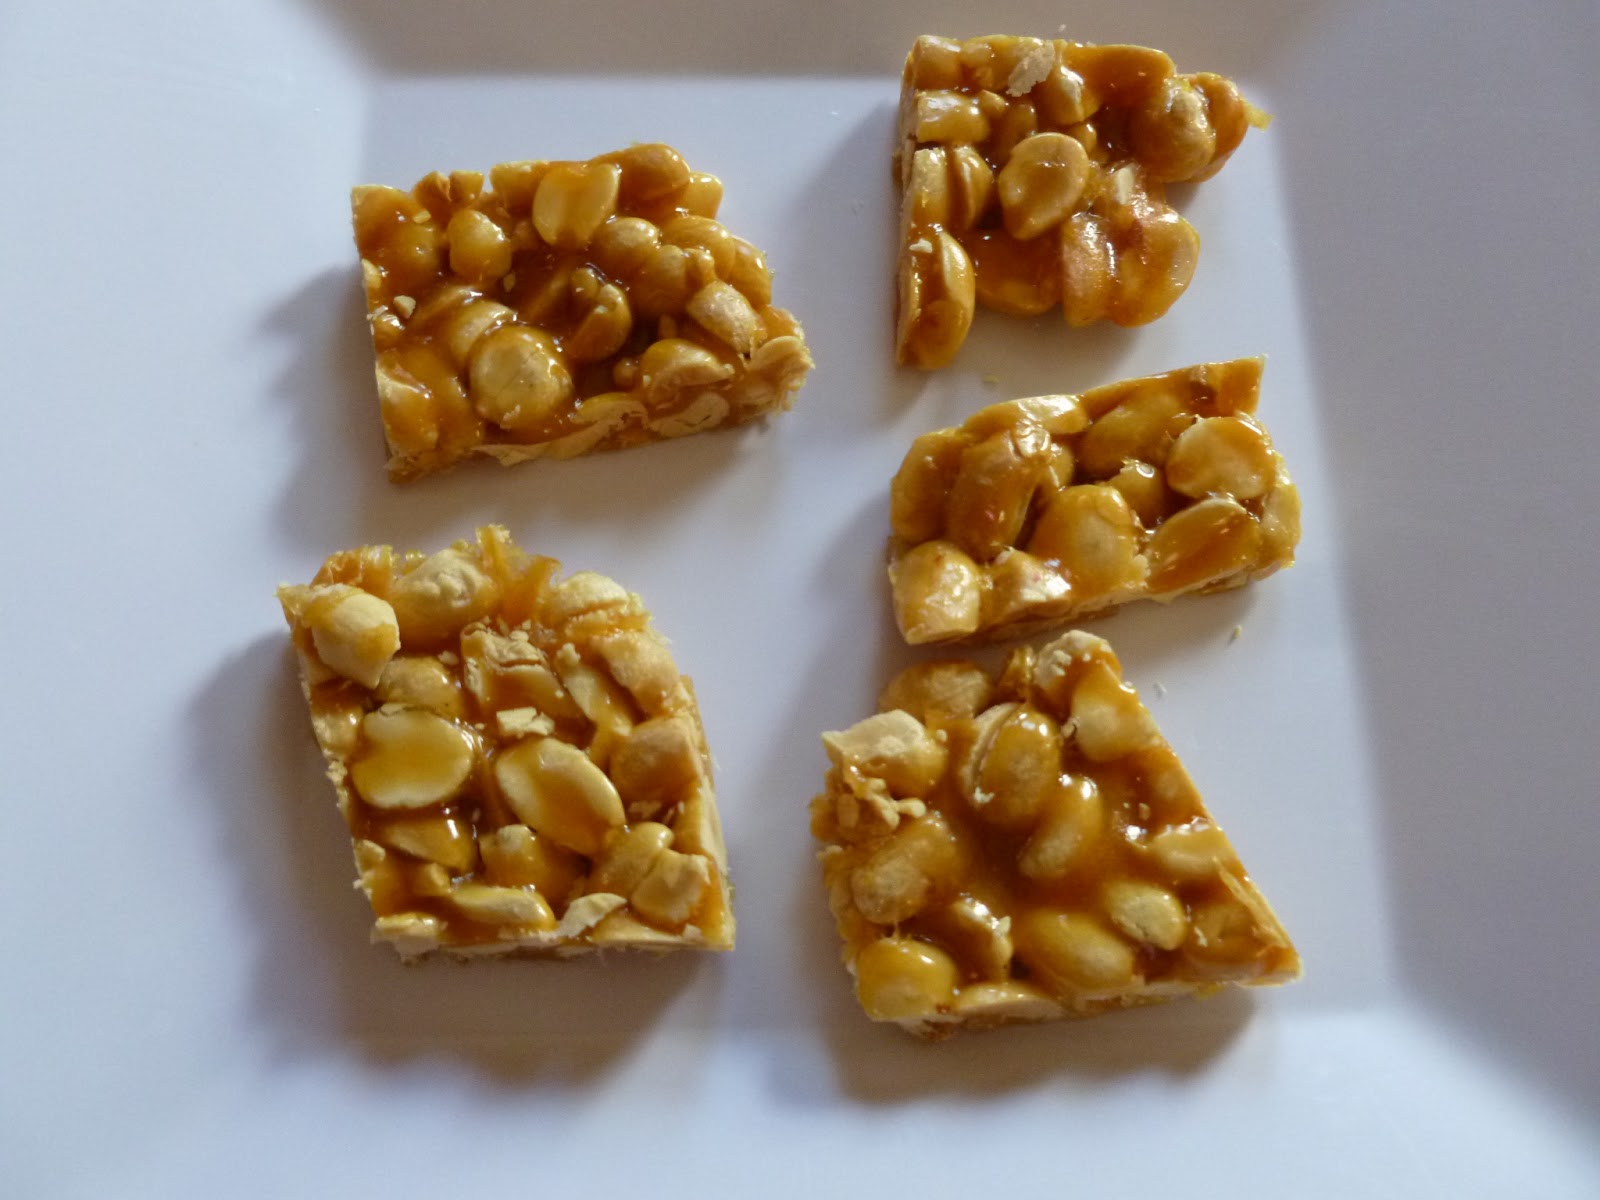
ShengdaNyachi Chikki - Indian Peanut Brittle


I am always awed by my mom's brittle making skills. But she always thinks that it's not a big deal at all. She thinks that the secret for making this brittle lies in the special jaggery which we call "chikki cha gooL". Generally, this special jaggery is widely available in Mumbai during January as everyone makes Tilache Ladoo for Makar Sankrant.

Once I got this special jaggery, I wanted to make chikki badly. I must confess though,  that my first attempt resulted in burning jaggery and hence instead of peanut brittle, it was peanut bitter!!;-) I guess it needed the second time charm!


ShengdaNyachi Chikki
शेंगदाण्याची  चिक्की 
Peanut Brittle
Ingredients
1 cup heaped unsalted, roasted peanuts
1 cup chikki cha gooL/special jaggery meant for making chikki
1 tsp ghee/toop/clarified butter

Few drops of ghee for greasing the steel plate

Method
1. In a wide and heavy bottomed saucepan, melt jaggery on a very low flame.

2. Add spoonful of ghee.

3. Keep stirring, till it gets darker and the mixture starts bubbling.

4. Add roasted peanuts and stir it so they are coated with jaggery.

5. Pour the mixture in a greased steel plate. Using the back of a steel wati/katori/ramekin, spread the peanut-jaggery mixture uniformly.

6. Let it cool down. Cut into pieces.

Note-
1. Make sure that you melt the jaggery on a low flame. Keep stirring and do not let it burn.
2. Similar chikki can be made with kurmure/mamra, puffed Rajgira, puffed chana daal/Pandharpuri DaaLe and coconut.
3. For making an authentic cashew chikki, you need to use sugar and liquid glucose.
4. Vegans may substitute oil instead of ghee. I haven't tried it myself but I think it may work ok.
5. Use the special jaggery meant for making chikki for the best results.
6. Consistency of the jaggery "paak" or syrup is the most important factor for making a perfect chikki. If you add peanuts too early, the chikki would be gooey like a caramel.


Print Page

Friday, June 28, 2013

Vaalache Birde(2)


Technically speaking, "Birde" or "Birdya" means sprouted beans without their peels. But this is synonymous with field or bitter beans which we call "Kadu or kadve vaal" in Marathi. My mom's vaalache birde is always green colored but my aunt's curry is brown colored. So that's what I am sharing it today.

Vaalache Birde(2)
वालाचे बिर्डे
Field Beans "brown" curry
Ingredients
2 cups sprouted and peeled field beans/kadve vaal
1 medium potato, peeled, cut into small chunks
salt to taste
1 tsp. jaggery

Grind to a smooth paste after roasting
1/2 cup dry/desiccated coconut
1/4 cup fresh coconut
1/2 tbsp. coriander seeds
1/2 tsp. cumin seeds
3-4 red chilies
3-4 black peppercorn
1" cinnamon
1/2 tsp. tamarind - Do not roast
1 tsp. oil for roasting spices

Tempering
1 tsp. oil
1/4 cup finely chopped onion
1/2 tsp. turmeric powder

Suggested Accompaniment
Rice Flour Flatbread/Tandalchi Bhakri

Method
1. Follow the procedure here to have 2 cups daaLimbya or sprouted/peeled bitter beans
2. Heat spoonful of oil for roasting spices in an iron or cast iron pan. Fry each spice one after the other. Fry coconut last as it doesn't need oil for roasting. Grind all the spices and coconut along with tamarind pulp to a fine paste. Add water as needed for grinding. Set aside.
3. Heat oil in a saucepan. Add onion and turmeric powder. Sauté till onion is soft. Add bitter beans sprouts taking care not to break the sprouts. Add potato pieces.
4. Add 2 tbsp. water and cover with a lid on top. Pour water on the lid. Let it cook on a slow fire till beans are cooked.
5. Add ground masala paste and water as needed to achieve the desired consistency.
6. Add salt and jaggery. Bring to boil. Switch the gas to low. Let it simmer for about 10 minutes.
7. Serve with plain rice or tandlachi bhaakri/rice flatbread.

Note -
1. Generally, a combination of fresh and desiccated coconut is added in most of the "brown" colored Malvani curries to enhance the taste.


Print Page

Thursday, June 27, 2013

Atavala - Rice Methi Kheer


This is a traditional kheer or sweet porridge from the GSB kitchens of Maharashtra. The GSBs of South Canara have a similar yet different sugarless version - Cheppi Kheer.

Atavala
Rice & Fenugreek Seeds Porridge
Ingredients
1 cup rice
1 tbsp fenugreek seeds

2 turmeric leaves
2 cups thick coconut milk
1/2 cup thin coconut milk
1/2 cup jaggery or to taste

4-5 cardamoms, peeled & crushed

Method
1. Wash rice and fenugreek seeds. Soak for 1 hour with sufficient water.
2. Drain. Place in a heavy bottomed saucepan. Add about 3 cups water and turmeric leaves - tied in knots. Bring to boil. Switch the gas to low. Simmer till rice is soft.
3. Mash a little, with the back of a ladle.
4. Add thick and thin coconut milk and jaggery. Simmer on low flame.
5. Stir in cardamom powder.
6. Serve warm.

Note
1. Discard turmeric leaves before serving.
2. Use freshly crushed cardamoms instead of ready made cardamom powder.
3. Adjust the amount of jaggery to your own liking.

Print Page

Wednesday, June 26, 2013

Baked Nachos


I had some leftover blue corn tortillas after making shrimp tacos. I decided to make nachos but instead of deep frying per traditional Nacho recipe, I baked them.


Baked Nachos
Ingredients
5 corn tortillas (I used blue corn tortillas)
Cooking spray
A generous pinch of salt

Suggested Accompaniment
Salsa of your choice
and/or Guacamole

Method
1. Using clean and dry kitchen shears, cut the corn tortillas into bite sized nacho pieces of the desired shapes and sizes.
2. Spray cooking spray generously.
3. Preheat oven 400 F
4. Bake for 12-15 minutes
5. As soon as it's out, sprinkle salt while it is still hot.

Note-
1. After 12 minutes of baking, pay close attention to the nachos. Make sure that they are not over baked.


Print Page

Monday, June 24, 2013

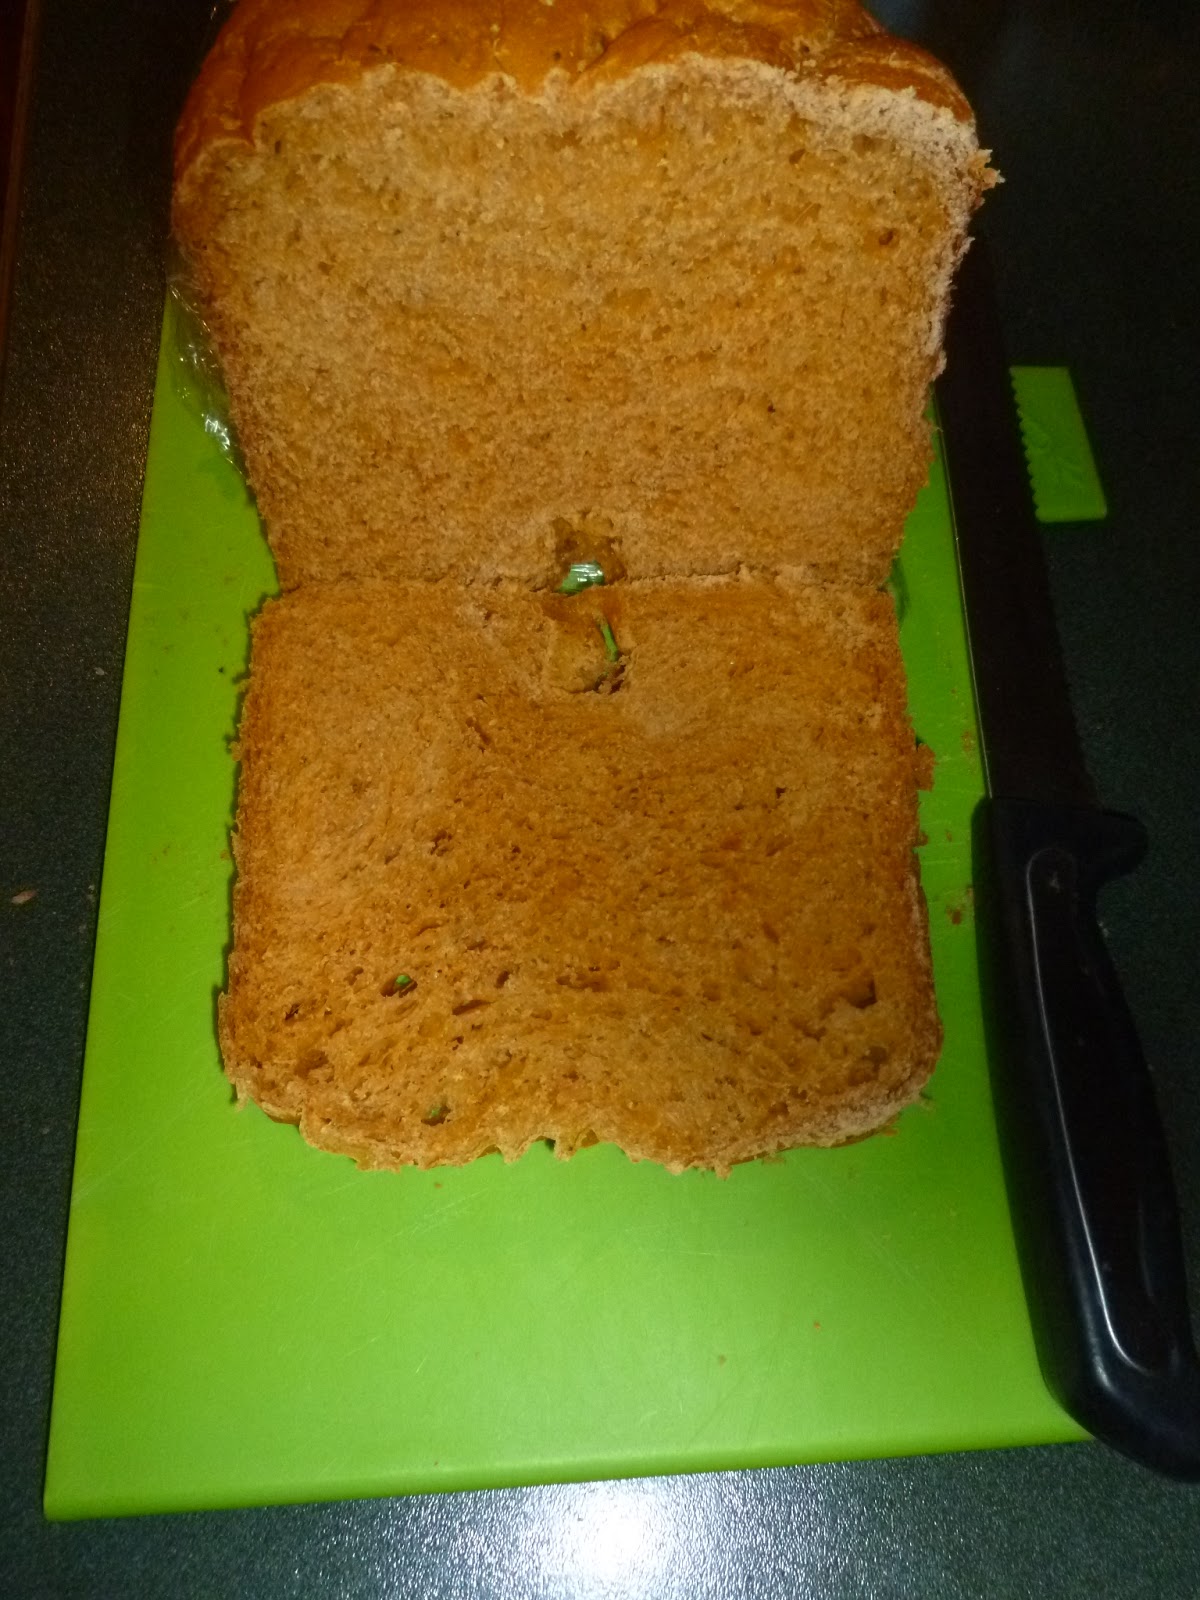
Tomato Basil Loaf


I tweaked my breadmaker machine's recipe for basic white bread and made my version of Tomato Basil loaf.  I was inspired to make this loaf after eating a delicious Mediterranean sandwich at Panera.


Tomato Basil Loaf
Ingredients
3 1/4 cup Bread flour (King Arthur or Bob's Red Mill)
1 cup Tomato Basil Pasta Sauce(such as Muir Glenn) + 1/4 cup warm water
1 1/2 tsp breadmakers/active rise yeast
1 tbsp sugar
1 1/2 tsp salt
1 tbsp olive oil

1 tsp Italian seasoning
1 tsp shredded Italian basil, fresh
1 sundried tomato from the jar, chopped

Method
1. Mix all the ingredients and knead to a smooth dough by hand.
2. You may need little more water to make a smooth dough. But adjust it depending on the consistency of the dough.


3. Cover and set aside in an oiled bowl till the dough doubes in size. Punch the dough down.
4. Place in a loaf pan. Cover and let it rise again.
5. Bake in a preheated oven 350F for 20-25 minutes.
6. Invert the loaf. Let it cool completely before slicing.

Note-
1. I have made the same recipe in the breadmaker but I must add that I have to add little water here and little flour there, based on the elasticity of the dough. Adjust accordingly.
2. Use this bread to make a delicious Mediterranean sandwich by spreading hummus, cucumber, tomatoes, spinach, thinly sliced onion, roasted red bell peppers.
3. I didn't use any fresh herbs or tomato in the first picture. I used fresh basil and chopped sundried tomato in the second picture of the dough.


Sunday, June 23, 2013

Prawns Pickle (2) - with tamarind pulp

 
This prawns pickle is known as "Prawns pickle with tamarind pulp" in my family.
 
Prawns Pickle(2) - (with tamarind)
Ingredients
Marinate
2 cups salad shrimp/small prawns
1/2 tsp turmeric powder
1 1/2 tbsp very hot chili powder (Adjust per taste)
2 tsp paprika or kashmiri chili powder(for color)
1/2 tsp asafoetida
 
Tempering
1/4 cup oil
1/2 tsp mustard seeds
1/2 tsp turmeric powder
1/2 tsp asafoetida
1/2 tsp fenugreek powder
 
You will also need
1/2 tbsp tamarind pulp
 
Method
1. Marinate shrimp with turmeric powder, asafoetida, very hot chili powder and paprika. Set aside for at least 30 minutes.
2. Heat oil in a heavy bottomed saucepan. Add mustard seeds, turmeric powder and asafoetida. As they start spluttering, take the saucepan off the gas. Stir in fenugreek powder.  Mix well.
3. Return to the gas. Add marinated shrimp and tamarind pulp. Let it cook in its own juice. Do not cover with a lid.
 
4. Switch off the gas. Let it cool down completely.
5. Use immediately or save the leftovers in the refrigerator.
 
Note -
1. This pickle does not have any shelf life. You can keep up to 2-3 days in the refrigerator.
 

Friday, June 21, 2013

Prawns Pickle(1) - with pickle masala


Mom's this instant prawns pickle is a family favorite.
 
Prawns Pickle (1) -(with pickle masala)
Ingredients
2 cups salad shrimp or small prawns
salt to taste
1/2 tsp turmeric powder
 
Tempering
4 tbsp oil
1/2 tsp mustard seeds
1/2 tsp asafoetida
1/8 tsp fenugreek seeds
 
You will also need,
1/2 cup readymade pickle masala
1 lemon
 
Method
1. Place shrimp, salt and turmeric powder in a heavy bottomed saucepan. Add 2 tbsp water. Cook together. Let it cool down completely. Do not cover.
2. After it is completely cooled off, add pickle masala and freshly squeezed lemon juice. Stir well. Set aside.
3. Heat oil in a small saucepan. Add mustard seeds, asafoetida and fenugreek seeds. When they splutter, switch off the heat. Let this tempered oil cool down completely.
4. Add the tempered oil to the shrimp mixture. Stir well. Set aside to marinate for at least 1 hour.
5. Refrigerate and use within 2-3 days.
 
Note-
1. This pickle does not have any shelf life.
2. Adjust salt depending on the salt content of the pickle masala.

Wednesday, June 19, 2013

Ravyache Ladoo


We have an onomatopoeic adjective to describe ravyache ladoo. We call it ravyache "bhusssss" ladoo. Probably this word came from the Marathi word - bhusbhusheet meaning crumbly. Unlike Raghavdas ladoo, these simple ladoos do not have coconut and hence, they get crumbled very easily. So they are known as "bhusssss" ladoos. I love them nevertheless.

My job was to recreate the recipe on a small or rather minuscule scale. In today's times of expanding waistlines, dietary precautions of less sugar/ghee and portion control, I make everything on a small scale. I like to make and feed traditional food to my family so when there are only 4-5 ladoos in the pantry, there is no question of overeating it. ;-)

Ravyache "bhusssss" Ladoo - (count 5)
Semolina Balls
Ingredients
1/2 cup fine rava/semolina
1/2 cup powdered sugar/peethi saakhar
2 tbsp ghee/toop/clarified butter

Garnish
2 cardamoms, peeled & freshly powdered
A pinch of nutmeg powder, preferably freshly grated
5 raisins

Method
1. Melt clarified butter in a heavy bottomed kadhai/wok. Fry raisins and set aside.
2. Add fine semolina and roast on low flame.
3. Switch off the gas. When the rawa is still warm, add sugar, raisins, cardamom and nutmeg powders.
4. Grease hands with clarified butter. Roll into ladoos of uniform shapes.

Note-
1. Do not let semolina burn. Make sure to roast on the low flame.


Print Page

Monday, June 17, 2013

Methi chi PataL Bhaaji - Fresh Fenugreek Leaves Curry


Mom's Methi chi paataL bhaaji is exactly like ALuchi paatal bhaaji. But it still tastes totally different because of the taste, aroma and flavor of the star ingredient - Methi.

Methi chi PaataL Bhaaji
Fenugreek Leaves Curry
Ingredients
1 bunch fresh fenugreek leaves, rinsed, cleaned and roughly chopped
2 tbsp raw peanuts, soaked in water for at least 2 hours
2 tbsp chana daal, soaked in water for at least 2 hours

Salt to taste
1 tsp Goda Masala
2-3 kokums, rinssed
1 tsp jaggery or to taste

Mix till no lumps
1 tbsp chickpea flour/besan
1/2 cup water

Tempering
1 tbsp oil
1/2 tsp mustard seeds
1/4 tsp asafoetida
1/2 tsp turmeric powder
2-3 Green chilies, slit

Garnish
1 tbsp oil
1/2 tsp mustard seeds

Method
1. Rinse, clean fenugreek leaves. Chop the leaves roughly. Set aside.
2. Heat oil in a heavy bottomed saucepan.
3. Add mustard seeds, asafoetida, turmeric powder and green chillies.
4. As they sizzle, add drained peanuts and chana daal. Saute for 30 seconds. Add 1/2 cup water. Cover and let it cook for 10 minutes.
5. Now add chopped fenugreek leaves. Add water if needed. Cover again and let it cook till soft.
6. Add goda masala, jaggery, salt and rinsed kokums. Add 1/2 cup water. Bring to boil.
7. Switch gas to low. Add chickpea flour + water mixture.
8. Simmer for 10 minutes.
9. Just before serving the curry, prepare the garnish of oil and mustard seeds. Heat oil in a small kadhai. Add mustard seeds. Let them splutter. When the curry is served in individual bowls, drizzle a spoonful  this tempered oil over the bowls.

Note -
1. Do not use dried/kasoori methi for this recipe.
2. Do not use roasted peanuts for this recipe.
3. Adjust jaggery and chilies per your own taste. But this curry is not meant to be very spicy.
4. Beasn + water mixture acts as a thickener for the curry.


Saturday, June 15, 2013

Mooli ke parathe(2)


This is the traditional method of making radish flatbreads. My earlier version was a quick fix where I knead all the ingredients together.

Mooli Ke Parathe(2)
Radish Flatbread
Ingredients
For the stuffing
1 1/4 cup grated radish
2 tbsp grated onion
1/2 tbsp ginger garlic paste
1/2 tsp ajwain/ajowan/owa
salt to taste
2 tbsp chopped cilantro
1 tsp garam masala
1 tsp minced green chilies
1 tsp pomegranate seeds powder or amchoor powder
1 tbsp besan/chickpea flour

For the Dough
2 cups wheat flour
salt to taste
2 tsp oil
water as needed

Oil for roasting
flour for dredging

Method
0. Mix wheat flour and salt. Adding water as needed, knead to a smooth dough. Add oil and knead again. Cover and set aside for at least 1/2 hour.
1. Squeeze water out of grated radish and onion.
2. Mix all the remaining ingredients and set aside.
3. Make about 9 - 12 uniform balls of the dough. Make the same number of the stuffing mixture.
4. Heat tawa/pan. Roll out a disc using flour for dredging. Add the stuffing and bring the ends of the disc together to form a ball. Dredge in flour and roll into a thick paratha.
5. Roast the paratha on the hot tawa, adding oil as needed. Cook on both sides till brown spots appear.
6. Keep in an aluminum foil till all the parathas are rolled out and roasted.
7. Serve with raita and pickle of your choice.

Note
1. Do not make stuffing ready too much in advance as it will get soggy.

Friday, June 14, 2013

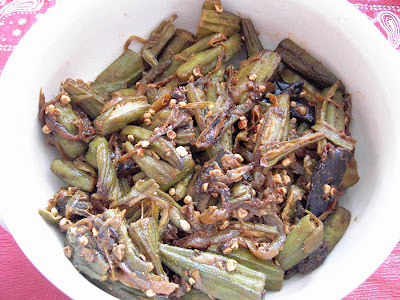
Bhendi Kanda - Bhendichi Bhaaji (2)


My aunt makes this delicious bhaaji, which tastes even better when onion is fried using lots of oil and the entire bhaaji is stir fried adding oil as needed. However, I try to limit our oil intake.

Bhendi Kandyachi Bhaaji
Okra with Onion
Ingredients
2 cups okra, remove both ends, halved and slit
2 cups thinly sliced onion
salt to taste
1 tbsp coriander-cumin powder
1 tbsp goda masala
1/2 tsp chili powder
1/2 tsp sugar or jaggery
3 kokums, rinsed

Tempering
2 tbsp oil
1/2 tsp turmeric powder
1/2 tsp asafoetida

Method
1. Rinse and dry okra. Remove both ends. Cut into 2" pieces. Make a slit on each piece.
2. Heat oil in a nonstick or iron kadhai/wok.
3. Add asafoetida and turmeric powder. Add thinly sliced onion. Saute till onion is soft.
4. Add okra. saute for 5 minutes.
5. Add all the powders. Keep on stir frying, adding more oil if needed.
6. Keep stirring from time to time till okra is cooked.
7. Add salt, jaggery or sugar and kokums.
8. Stir well. Switch off the gas.
9. Serve with chapati.

Note
1. Add more oil if necessary.
2. Do not cover while cooking.
 

Tuesday, June 11, 2013

Fodniche Varan


Many times mom used to make Moogachya Daaliche Varan. I didn't care for it much because I love Toor Daal Varan. But I loved when she gave tempering/FodNi to the same Moog daal varan. I loved to slurp the thin broth.

 
FodNiche VaraN
Moong Daal Broth
Ingredients
1 cup yellow moong daal, cooked
1/2 tsp turmeric powder
1/4 tsp asafoetida

salt to taste
2 - 4 cups water

Tempering
2 tsp oil
1/2 tsp mustard seeds
1 sprig curry leaves
1/2 tbsp grated ginger
1 tomato, chopped
1/2 tsp goda masala


Garnish
1 tbsp coriander leaves, chopped

 
Method
1. Pressure cook moong daal adding turmeric powder, asafoetida and adequate amount of water. Mash lightly and set aside.
2. Heat oil in a saucepan. Add all the ingredients for tempering.
3. As they sizzle, add cooked daal, 2 cups water, jaggery & salt. Bring to boil.
4. When it comes to a rapid boil, lower the gas and let it simmer. Add more water if necessary.
5. Garnish with cilantro.

Note -
1. This daal is meant to have a thin consistency.
2. Note that the amount of goda masala is very less in this recipe.
 

Monday, June 10, 2013

Moog Daaliche VaraN


My mom uses different legumes, daals and beans to make delicious curries. Varan-bhaat was probably the first daal-rice combo I ever ate in my life. I always wondered why mom would even use moong daal to make varan as toor daal is the best candidate for making this simple, plain daal. Mom's explanation was that moog daal is easier to digest than toor daal and there should always be some variety.

If you are making varan for the first time, do use toor daal for authenticity.

Moogachya Daaliche Varan
मुगाच्या डाळीचे वरण
Plain & Bland Mung Daal
Ingredients
1 cup yellow moong daal, rinsed
1 1/2 cups water
1/2 tsp turmeric powder
1/2 tsp asafoetida

salt to taste
1 tsp jaggery

Suggested Accompaniment
Toop/Clarified butter
Lemon Wedges
Plain Rice
Lemon Pickle
Batatyachya Kaachrya

Method
1. Pressure cook moong daal with turmeric powder, asafoetida and water.
2. Mash completely. Transfer to a saucepan.
3. Add salt and jaggery. Bring to boil.
4. Simmer for 10 minutes.
5. Serve with plain rice, ghee/toop and lemon pickle.

Note -
1. Use yellow moong daal for this recipe.


Print Page

Wednesday, June 5, 2013

Kadai Mushrooms


I make this curry when I am in a hurry. :-D

Kadai Mushrooms
Stir Fried Mushrooms
Ingredients
2 cups sliced button mushrooms
salt to taste
2 tsp coriander-cumin powder, preferably fresh
1 tbsp tomato paste
 
Tempering
2 tsp oil
1/2 tsp cumin seeds
2 red chilies, halved (optional)
1 cup minced onion
1/2 cup minced tomato
1 1/2 tsp ginger-garlic paste
 
Method
1. Heat oil in a wok or kadhai.
2. Add cumin seeds and chilies - if using.
3. As they splutter, add onion and turmeric powder. Saute till onion is soft.
4. Now add ginger-garlic paste. Saute for 5 minutes.
5. Add tomatoes and saute till they are pulpy.
6.  Sprinkle some water from time to time if masala sticks to the bottom of the kadhai.
7. Add coriander-cumin powder, garam masala, paprika and tomato paste. Saute for 5 minutes.
8. Add mushrooms and salt. Saute till mushrooms is cooked.
9. Garnish with cilantro on top.
 
Note -
1. Sometimes I add bell pepper/capsicum with mushrooms.

Tuesday, June 4, 2013

Cheese Pav Bhaaji

 
There are just innumerable types of pavbhaji sold in Mumbai. Cheese Pavbhaji is one of them. Addition of the grated cheese on the pav bhaaji was my way of enticing Gudiya to eat her veggies!;-)
 
I have already blogged about my version of pavbhaji. I just added some grated Mozzarella cheese and served with toasted sourdough sliced bread (Snappy Sourdough, no less!;-) from Whole Foods. You can add any cheese of your choice. Growing up, I knew only "Amul" cheese and that's what gets added to the authentic Mumbai Pav Bhaaji. 


Print Page

Saturday, June 1, 2013

High Fiber Appe or Idlies


I had packet of 17 beans soup mix from Trader Joes. I had tall plans to make this soup like "Daal Makhni" or "Daal Maharani". But it never happened. After keeping that packet for infinity on my pantry shelf, I finally decided to use it off at once.

If I had indeed made that soup, it would have lasted us forever. So I decided to make an idli like batter and freeze it. I remembered that Saffron Hut had posted 16 beans Adai many years ago. I decided to use her idea and made idli/appe.

High Fiber Appe
Ingredients
1 pack 17 beans & Barley soup
1 cup brown rice
1 cup urad daal

1/2 tsp asafoetida
salt to taste

Oil as needed

If making appe -
Stir in the batter
2 sprigs curry leaves
3 green chilies (or as needed) minced
2 tbsp finely minced red onion
1 tsp whole black peppercorns

Method
1. Soak beans, rice, daal overnight. Make sure it has plenty of water.
2. Drain and grind to a smooth batter adding salt and asafoetida.
3. Take out in a big container. Cover and set aside to ferment.
4. After fermenting, I keep half of the batter in a freezer safe container for later use.
5. If making appe, add the additional ingredients in the batter. Add more water if needed to adjust the consistency. Adjust salt. Heat Appe kayili/paatra/pan. Add oil and fry appe till they are browned on both the sides. Serve with chutney of your choice.
6. If making idli, grease idli pan/paatra and steam idlies. Adjust for salt and water as needed before pouring the batter. Serve idlies with chutney or sambar.

Note -
1. I used half of the batter to make idlies and the other half for making spicy appes.

Credits
http://saffronhut.blogspot.com/2006/11/more-is-more-16-bean-adai.html


17 Bean & Barley Idlies

Print Page