Monday, April 29, 2013

Soya Badi aur Alu - Potatoes with Soy Chunks


I was inspired to make this curry after tasting it at Raja Foods, Jackson Heights, NY. This is my version.

Soya Badi Aur Alu
Potatoes with Soy Chunks
Ingredients
4 medium potatoes, boiled, peeled and roughly chopped
1 cup Soy chunks like Nutrela soaked in water for at least 2 hours
salt to taste

1 tsp Punjabi Garam Masala
1 tbsp coriander-cumin powder
1 tsp chili powder

*Grind to a fine paste
1 cup cilantro
10 Mint leaves
3-4 green chilies
3 garlic cloves
1" ginger
1 tbsp lemon juice
salt to taste

Tempering
1 tbsp oil
1/2 tsp cumin seeds
1/2 tsp turmeric powder
1/4 tsp asafoetida
* Green paste
1 cup chopped onion
3/4 cup chopped tomatoes

Garnish
2 tbsp minced cilantro

Suggested Accompaniment
Onion Kulcha
and
Raita

Method
1. Soak Soy chunks like Nutrela in water for at least 2 hours. Drain. Add about 2 tbsp green paste to the drained soy chunks and pressure cook adding 2 tbsp water for 2-3 whistles. Keep aside.
2. Heat oil in a heavy bottomed saucepan. Add the ingredients for tempering. Saute onion till it is soft.
3. Add remaining green paste and saute for about 5 minutes. Add tomatoes and keep on sauteing till oil leaves masala.
4. Add coriander-cumin powder, garam masala and chili powder. Add potato pieces, crush few pieces by hand to give thickness to the gravy.
5. Add cooked soy chunks and water as need.
6. Add salt to taste - remember there is salt in the green paste. Adjust accordingly.
7. Simmer for few more minutes.
8. Garnish with cilantro.
9. Serve with lemon wedges and flatbread of your choice.

Note -
1. Nutrela chunks are like a blank canvas as they are very bland. Make this curry in advance so they can soak up the gravy/masala.
2. For variation, grind onion and tomatoes before sauteing in the oil.

Credits
Raja Sweet & Fast Foods, Jackson Heights, NY
7231 37th Ave
Jackson Heights, NY 11372


Print Page

Saturday, April 27, 2013

Vegetable Biryani


I try to make my Biryani using less clarified butter than the traditional requirement. I think the spices adjust quite well and it tastes good too. But if you are looking for richer taste, please feel free to add more ghee.

Biryani is a very elaborate affair. But once it's ready it is worth the wait.
 
Vegetable Biryani - (1)
Layered Basmati Rice with Vegetables
Ingredients
2 cups Basmati rice, soak for 30 minutes, drain
 
Whole spices/Khada Masala
3 cloves
1 green cardamom
1 black cardamom
1 bayleaf
2 pieces of 2" cinnamon
salt to taste
 
Garnish 1
1 tbsp milk
Few strands of saffron
 
Grind to paste
4 Kashmiri chilies, soaked in water till they are plump
1 medium red tomato, chopped
2" ginger, peeled, chopped
3 cloves garlic, peeled, chopped
1 green cardamom, seeds only
6 fresh mint leaves
 
Tempering
1 tbsp clarified butter/ghee
1 cup chopped onion
1 medium red tomato, chopped
 
Garnish 2
1 tbsp oil
1 cup thinly sliced onion
A pinch of sugar
5 fresh mint leaves, shredded into ribbons
 
Vegetables
2 cups mixed vegetables like carrots, green peas, green beans, cauliflower florets, potatoes
1/4 cup yogurt
1 cup water
salt to taste
 
Gravy
1/4 cup yogurt
1 tsp sugar
 
Suggested Accompaniment
Papad
Pickles
 
Method
1. Cook Basmati rice adding double amount of water and whole spices and salt. Make sure it is not cooked fully. Set aside. Discard whole spices.
2. Warm milk and saffron strands and stir to get a bright yellow orange color. Add this mixture over half-cooked rice so only some rice grains get coated with saffron mixture.
4. Grind masala paste for the gravy and set aside.
4a. Heat oil in a saucepan for garnish (2). Add a pinch of sugar. As it caramelizes, add thinly sliced onions and fry till they are brown. Add shredded mint leaves. Set aside for later use.
5. Heat oil and ghee in a heavy bottomed saucepan. Add onions. saute till onions are browned. Add masala paste and tomatoes. Saute for 15 minutes adding spoonful of yogurt from time to time. Add coriander-cumin powder with Mughlai garam masala. Add salt to taste.
6. Add vegetables and 1 cup water. Bring to boil. Cover and let it cooked till vegetables are semi-cooked. Adjust for salt and sugar.
7. Spray or butter an ovenproof container. Spread a layer of rice at the bottom. Add vegetable mixture on top. Layer with another layer of rice and then vegetables. Continue till all the mixture is over. Make sure that rice is the topmost layer.
8. Spread browned, caramelized onion on top. Drizzle saffron + Milk Mixture.
9. Cover tightly using aluminum foil.
10. Bake in the preheated oven (350F) for about 30 minutes.
11. Serve with Raita, achar and papad.
 
Note -
1. For garnish, you can also fry cashews and raisins and add along with caramelized onion. Even potatoes can be cut into chips/French fries and deep fried and added as a garnish along with caramelized onions.
2. Use more ghee for tempering. Add ghee for cooking rice and also drizzle more ghee around before sealing the biryani with aluminum foil. This gives richer taste but more calories as well!
3. Instead of using oven, biryani can also be "baked" using indiret heat method. In that case, heat an iron tawa. Place Biryani pot on top and let it cook on a very low heat for about 1 hour. Tratitionally, wheat dough is sealed around the lid so that the steam is not escaped. This method is called "Dum chadhana".
 

Thursday, April 25, 2013

Lobiya


This is a simple Black Eyed Peas curry with Punjabi Spices.

Tariwale Lobiya
Black Eyed Peas Curry
Ingredients
1 cup dry or approx 3 cups soaked/sprouted black eyed peas
1 tsp ginger-garlic paste
salt to taste
1 tbsp coriander-cumin powder
1/2 tsp Punjabi Garam Masala
1 tsp chili powder

Grind to a fine paste
1 1/2 cup chopped onions
3/4 cups tomatoes
1" ginger
3 cloves garlic
3-4 green chilies (adjust per your preference)
1/4 cup chopped cilantro

Tempering
1 tbsp oil
1/2 tsp cumin seeds
1/2 tsp turmeric powder
1/4 tsp asafoetida
2 tbsp chopped onion

Garnish
1 tbsp minced cilantro

Suggested Accompaniment
Lemon wedges
Paratha
or
Jeera Rice
with
Kachumbar

Method
1. Pressure cook  black eyed peas adding adequate water and 1 tsp ginger garlic paste. Set aside to cool down.
2. Grind onion, tomatoes, cilantro with chilies, ginger and garlic - preferably without adding any water.
3. Heat oil in a heavy bottomed saucepan.  Add cumin seeds, asafoetida and turmeric powder. As they sizzle, add onion and saute till onion is soft.
4. Now, add ground paste and fry till oil leaves the masala. It may take about 30 minutes. Keep on sauteing on low flame.
5. Add coriander-cumin powder, chili powder  and garam masala. Saute for 5 minutes.
6. Add cooked black eyed peas along with cooking liquid.
7. Add more water if necessary. Add salt to taste. Bring to boil.
8. Switch gas to low. Simmer for 10-12 minutes.
9. Switch off the gas. Keep covered for 15 minutes. Garnish with cilantro before serving.

Note-
1. Small chowli/chori beans/cowpeas can also be used.


Tuesday, April 23, 2013

Moogachi Kachchi amti


Mom makes this delicious curry called "Kachchi" AamTi. Actually, "Kachchi" means raw in Marathi, but this curry is not "raw" per se. Since no masala or coconut or spices are roasted for making this curry, it is referred to as "Kachchi".

Moogachi Kachchi Aamti
Moong Sprouts Curry
Ingredients

2 1/2 cup moong sprouts or 1 cup moong beans, soaked and sprouted as here
1/2 tbsp jaggery or to taste
salt to taste
1/2 tsp chili powder
3 kokums, rinsed

Whisk till no lumps
1 tbsp besan/chickpea flour
1 cup water

Tempering
1 tbsp oil
1/2 tsp mustard seeds
1/4 tsp asafoetida
1/2 tsp turmeric powder
1 sprig curry leaves, torn
2 tsp Goda Masala

Garnish
1 tbso fresh coconut
1 tbsp cilantro, chopped

Method
1. Pressure cook moong sprouts making sure they do not turn into a mush. Set aside to cool down.
2. Heat oil in a saucepan. Add mustard seeds, asafoetida, turmeric powder and curry leaves. When they splutter, add goda masala. Saute for 30 seconds.
3. Add cooked moong along with its cooking liquid, chili powder, jaggery, salt & kokums.  Add more water as needed to get the curry like consistency. Bring to boil.
4. Switch gas to low. Add besan & water mixture in a single stream while stirring  with other hand. This acts as a thickener. Let it cook for 5 minutes.
5. Stir in coconut and cilantro.

Note -
1. Besan and water acts as a thickener. Adjust per desired consistency of the gravy.

Sunday, April 21, 2013

Amritsari Tali Machli


Amritsari Tali Machli is a popular Punjabi Fish fry. Instead of dredging the marinated fish fillets/steaks in rice flour or semolina like we do traditionally, the fish is dredged in the besan batter and then deep fried. Since I am not too much into deep frying, I use shallow fry method my "tali machli".


Amritsari Tali Machli
Fish Fry from Amritsar
Ingredients
4 fillets of boneless, skinless white fish like Tilapia
salt
1 tbsp lemon juice
A generous dash of black pepper
1 tsp mild chili powder or paprika
1/2 tsp asafoetida
1/2 tsp turmeric poweder
1 tbsp ginger-garlic paste

Batter
3/4 cup besan/chickpea flour
1 tbsp rice flour
1/2 tsp turmeric powder
salt to taste
1/8 tsp owa/ajwain
A pinch of baking soda
water as needed to make a thick batter

Frying
1/4 cup Oil for  shallow frying in the cast iron
or
oil as needed for deep frying

Garnish
A dash of chaat masala
A dash of amchoor powder

Suggested Accompaniment
Lime wedges
Ketchup
Mint chutney
Sliced onions


Method
1. Clean, rinse and drain the fish pieces. Pat dry using paper towel.
2. Add ginger-garlic paste, salt, pepper, turmeric powder, asafoetida,  black pepper powder and chili powder. Cover and marinate for at least half an hour. Refrigerate till ready to use.
3. Meanwhile, prepare a thick batter of besan/chickpea flour, rice flour, turmeric powder, salt, ajwain, chili powder and ginger-garlic paste, adding water as needed. Make sure that there are no lumps. Add baking soda just before using the batter.
4. Heat oil for deep or shallow frying. Add a spoonful of hot oil in the batter. Whisk.
5. Shake off any excess liquid from the marinated fish fillet. Dip it into the batter so the batter is thickly coated around the fish. Fry 2 pieces at a time [Deep frying or shallow frying is your choice!]
6. Keep the fried fish onto a paper towel to absorb any excess oil. Sprinkle chaat masala and amchoor powder.
7. Serve with cut onions, lemon wedges, kethcup or hot sauce and green chutney of your choice.

Note
1. You can use Indian fish like Pomfret/Paplet, King Fish/Surmai, Rawas or American mild white fish like Tilapia, Grouper, Snapper For this recipe.
2. My method of using cast iron skillet is as below. Heat 1/4 cup oil - preferably vegetable or peanut oil for frying in a cast iron skillet. Place 2 fish fillets (dipped in the batter as mentioned in 5 above). Flip after 3-4 minutes so they are cooked on both sides. Follow same procedure for remaining fillets. Place onto a clean paper towel to absorb excess oil. Preheat oven 350F. Place fish fillets on a baking tray. Bake for 10 minutes more. Since we are not deep frying in this method, baking further ensures that the fish fillets are crisp.
3. If you feel that the fish fillets are too big, halve them.


Friday, April 19, 2013

Navratan Curry

Navratan Curry with Naan

Sometime in 80s, my mom bought Prestige Pressure Pan. This pan was used for making curries directly in the pan while using the pressure cooking technique. Mom tried the recipe of Navratan curry from the recipe brochure that accompanied the pan. She also added some beetroot cubes, thus making this curry shocking pink/red. Many years later, as I collect my nav ratan or nine jewels for making this curry, I always use beetroot because I associate the addition of beetroot and that shocking pink/red color with this curry.

Click here for the recipe of Navratan Korma.

Navratan Curry
Recipe adapted from Prestige Pressure Pan Recipe Booklet
Ingredients
1/2 of medium cauliflower, cut into florets
1 beetroot, peeled and cut into bite sized pieces
1 potato, peeled and cut into bite sized pieces
A handful of green peas, fresh or frozen but not dried
A handful of Paneer cubes
A handful of Puffed lotus seeds/Makhna
1 carrot, peeled and cut into bite sized pieces
1 tomato, chopped

Grind
5 black peppercorn
1/3 cup coconut
3-4 cloves garlic
2 tsp paprika or mild chili powder
1/2 tsp cumin seeds
1/2 cup chopped onion

Tempering
1 tbsp oil

Suggested Accompaniment
Naan
or
Kulcha
or
Rumali Roti
and
Salad

Method
1. Cut all the vegetables as mentioned above. Immerse cauliflower pieces into a salted water till ready to use. Just before using, discard the water.
2. Fry paneer pieces so they are nicely browned on both sides.
3. Fry Maknna or lotus seeds so they are nicely browned on both sides.
4. Grind masala mixture into a fine paste.
5. Heat oil in a pressure pan or pressure cooker. Add ground paste. Saute till the oil leaves the masala.
6. Add all the veggies. Do not add paneer or makhna at this point. Add 2 cups water. Pressure cook for 2-3 whistles.
7. Add salt, paneer and makhna. Simmer for 10 minutes.
8. Serve with Naan and lemon wedges

Note -
1. I vary the 9 jewels or ingredients based on my whim and availability in the pantry/refrigerator. I sometimes add green beans/cashews/raisins/corn.

Credits
Prestige Pressure Pan Recipe Booklet


Print Page

Wednesday, April 17, 2013

Sandgyanchi Amti

 
My best friend's mom, Kaku has shared her recipe with me for making "KohLyache Sandge" which is Maharashtrian equivalent of "Vadi/Badi" or "Vathal". I do plan to make them sometime in the future, but for now, I used the readymade sanDge from Bedekar Condiment House, Dadar, Mumbai.
 
The curry made from these saanDge is a very common GSB - especially Maharashtrian GSB preparation.
 
 
Kaku's SanDgyanchi Aamti
Ashgourd Fritters Curry
Ingredients
3/4 - 1 cup KohaLyache SaanDge (see below)
salt to taste
2 tsp jaggery or to taste
 
Grind to a coarse paste
1 cup freshly scraped coconut
1 tsp tamarind paste
5-6 byadgi chilies (roast before grinding)
1 tsp coriander seeds (roast before grinding)
water as needed
 
Tempering
2 tsp oil (preferably coconut oil)
1/2 tsp mustard seeds
 
A spoonful of Coconut oil for roasting saanDge
 
Method
1. Roast saaDge in a spoonful of coconut oil. Set aside.
2. Grind coconut mixture to a coarse paste, adding water as needed.
3. Heat oil - preferably coconut oil - in a saucepan. Add mustard seeds. As it splutters, add roasted sandge and give a quick stir.
4. Add ground coconut paste, jaggery and salt to taste. Add 1/2 cup water.
5. Bring to boil. Add more water if needed but do not make it of a thin consistency.
6. Simmer for few minutes.
 
 
Note -
1. Do not add too much water to this curry. This curry is not meant to have a broth like consistency. It's on thicker side.
2. Adjust jaggery and tamarind to your own preference. 
 
 
KohLyache SaanDge - 2 types
 
Back row - meant to be fried and eaten as an accompaniment with the meal
Front tow - meant for making curry
 
I got both of these from :-
 
Bedekar Condiment House
2/3 Ganga Niwas, Ranade Road, Dadar West, Mumbai


Monday, April 15, 2013

Gawar Batata - Cluster Beans with potatoes


This is my mom's Gawar Batata. I didn't care for it much as a child. But today I enjoy eating this simple bhaaji. A good quality goda masala and jaggery are two important ingredients for this bhaaji.


Gawarichi Bhaaji
Cluster beans with potatoes
Ingredients
2 cups cluster beans/gawar/guvar/mitkasang
1 medium or 2 small potatoes, peeled and cut
1 tsp chili powder
1/2 tbsp jaggery
salt to taste
 
Tempering
2 tsp oil
1/2 tsp mustard seeds
1/4 tsp asafoetida
1/2 tsp turmeric powder
1 tbsp goda masala
1/4 cup chopped onion
3-4 garlic cloves, chopped (optional)
 
Garnish
1 tbsp freshly scraped coconut
 
Method
1. Heat oil in a saucepan. Add the ingredients for tempering. Saute till onion is soft.
2. Add cluster beans and potatoes, chili powder. Add 2 tbsp water.
3. Cover the saucepan with a lid. Pour some water on the lid. Let it cook till veggies are cooked. If needed you can pour a spoonful of water from the lid to saucepan to prevent sticking, from time to time. Continue cooking till gawar is cooked.
4. Add salt and jaggery.
5. Add coconut to garnish.
6. Serve with chapati
 
Note -
1. A good quality goda masala is the most important ingredient for making this bhaaji taste good.
2. To expedite the cooking process, mom steams gawar and potatoes in the pressure cooker before adding to the tempering.

Sunday, April 14, 2013

Orange Chicken


One of Gudiya's favorites!

Orange Chicken
Ingredients

Marinate -
1 lb boneless, skinless chicken, cut into small bite sized pieces
1 tsp orange zest
1/2 tsp turmeric powder
1 tsp paprika
Few dashes of Soy sauce
1 tsp rice vinegar
1/2 tsp Chinese All spice powder

Tempering
1 tbsp toasted sesame oil

Whisk
1/2 cup freshly squeezed orange juice
salt to taste
1 tbsp sugar (or as needed)
1 tbsp tomato ketchup
1/2 tbsp orange marmalade(optional)
1 tbsp corn starch

Garnish
Chopped greens of scallions/spring onions

Suggested Accompaniment
Plain Rice (preferably Jasmine Rice)

Method
1. Marinate chicken with the ingredients.
2. Heat sesame oil in a wok.
3. Fry chicken pieces with marinade. Cook till chicken is soft and the liquid evaporates completely.
4. Add whisked mixture. Stir till a sauce is formed.
5. Garnish with scallions greens.
6. Serve with plain rice.

Note -
1. In order to avoid deep frying, I add chicken pieces with marinade and let it cook till the liquid evaporates. For richer version, you can deep fry these chicken pieces. In that case, shake off the excess marinade and deep fry till crisp.


Print Page

Tuesday, April 9, 2013

Kobij na Pooda - Cabbage Pancake


Sometime back, I discovered that if we request, Whole Foods guys happily cut the cabbage in half and let us buy only that half. That works perfectly well for our family's weekly needs.  So many times, rather than buying one big green cabbage and one big purple cabbage,  I get the halves.

Kobij na Pooda
Cabbage Pancake
Ingredients
1 cup yellow Moong Daal, Soak for  3-4 hours

Grind drained daal with
1/2 tsp turmeric powder
2" ginger, peeled
1 clove garlic
1/2 tsp asafoetida
2 green chilies or to taste

You will also need,
salt to taste
1/3 cup minced onion
1/4 cup minced cilantro
1/2 of small cabbage head, grated

Oil for greasing

Method
1. Drain the moong daal and grind with turmeric powder, salt, ginger, garlic and asafoetida.
2. Stir in minced vegetables and salt. Make a batter of not too thin, not too thick consistency adding water as needed.

3. Heat a pan/griddle/tawa. Pour a ladleful of batter. Drizzle oil as needed. Cover and let it cook.
4. Flip on the other side. Cook till brown spots appear on both sides and it appears crispy to your liking.
5. Serve hot with tomato ketchup or chutney of your choice.

Note -
1. Instead of ground moong daal, same pooda can also be made using besan/chickpea flour or vada nu loat.
2. If you like a spicy bite, you can mince green chilies and add to the batter.
3. Purple cabbage or even savoy cabbage works well with this recipe.


Print Page

Sunday, April 7, 2013

Cilantro Dip


Versaille's is a Cuban restaurant located in the Little Havana neighborhood of Miami, Fl. If you ever go there, you must try some of their very Cuban delicacies. The outside window serves delicious guarapo or sugarcane juice, a shot of strong Cuban coffee & Cuban pastries. If you want a quick snack of Cuban Sandwich and pastries, go to their bakery cafe next door. If you prefer to be seated and be served, then go inside and be immersed with animated Spanish conversations all around you. Try Yucca Chips with Cilantro Dip as an appetizer. If you are a seafood connoisseur like me, do try their "Kingfish". It's for the very first time in my life, I ate "Surmai" in any  restaurant in the United States. It was delicious and fresh. and to finish off your meal, you may want to try Dulce De leche or Tres Leche Cake. Don't forget to take a small parcel of their plantain chips for munching later.

Today's cilantro dip is inspired from Vesailles' signature recipe. This is just my version. Serve with any fritters of your choice.


Cilantro Dip
Ingredients
2 garlic cloves, peeled & chopped
1 bunch cilantro
salt to taste
freshly ground black pepper, a dash
A pinch of sugar
1 cup sour cream or Greek Yogurt

Method
1. Chop cilantro and garlic cloves roughly. Process in a mini food processor, adding salt, pepper and sugar.
2. Process once more adding sour cream or greek yogurt.

Note-
1. Use green chilies if you prefer a spicier version.

Credits
Recipe inspired from -
http://www.versaillescuban.com/
 
Yucca Chips with Cilantro Dip at Versailles


Print Page

Saturday, April 6, 2013

Tomatillo Shrimp


We sampled some coastal Mexican food from Guadalajara, recently. It was delicious and different from the usual Mexican fare of bean burrito, Quesidilla, Fajita and taco. As soon as I tried Tomatillo Shrimp, I was dying to make my own version. Don't be surprised if you see some more Coastal Mexican delicacies being featured on this blog in the near future.

Tomatillo Shrimp
Ingredients
1 tbsp oil
3-4 Green Tomatillos, sliced
2 jalapenos (optional)
1 onion, sliced
1/2 cup cilantro
4-5 cloves garlic, sliced

Sugar to taste(optional)

1/2 tbsp Italian seasoning (It's my version so Mexican and Italian live happily in my pantry!!!)
1/2 tsp cumin powder

1 cup shrimp
salt
1/2 tsp turmeric powder(I told you, it's my version, why not Indian then???)

1 cup button mushrooms, sliced
1/2 cup sliced onion
1/2 tbsp oil

Method
1. Marinate shrimp with salt and turmeric powder. Refrigerate till ready to use.
2. In a cast iron pan, heat 1 tbsp oil. Saute onion, tomatillos and garlic till they are brown and pulpy. Add Italian seasoning and cumin powder. Add cilantro and fry for 1 minute till it gets wilted. Let it cool down.
3. Grind above mixture. Set aside.
4. In a saucepan, heat 1/2 tbsp oil. Saute sliced onion till they are soft. Add mushrooms and saute for 5 minutes.
5. Now add marinated shrimp. Saute for 2 minutes.
6. Add ground green paste, salt,  and sugar - if using. Add little water if needed.
7. Simmer till thick gravy is formed.
8. Serve with plain rice and tortilla

Note -
1. Though turmeric powder is not used in Mexican cooking,  I like to use turmeric with any seafood.
2. Sugar is added to balance the tart flavor of tomatillos. Adjust per your liking.


Print Page

Friday, April 5, 2013

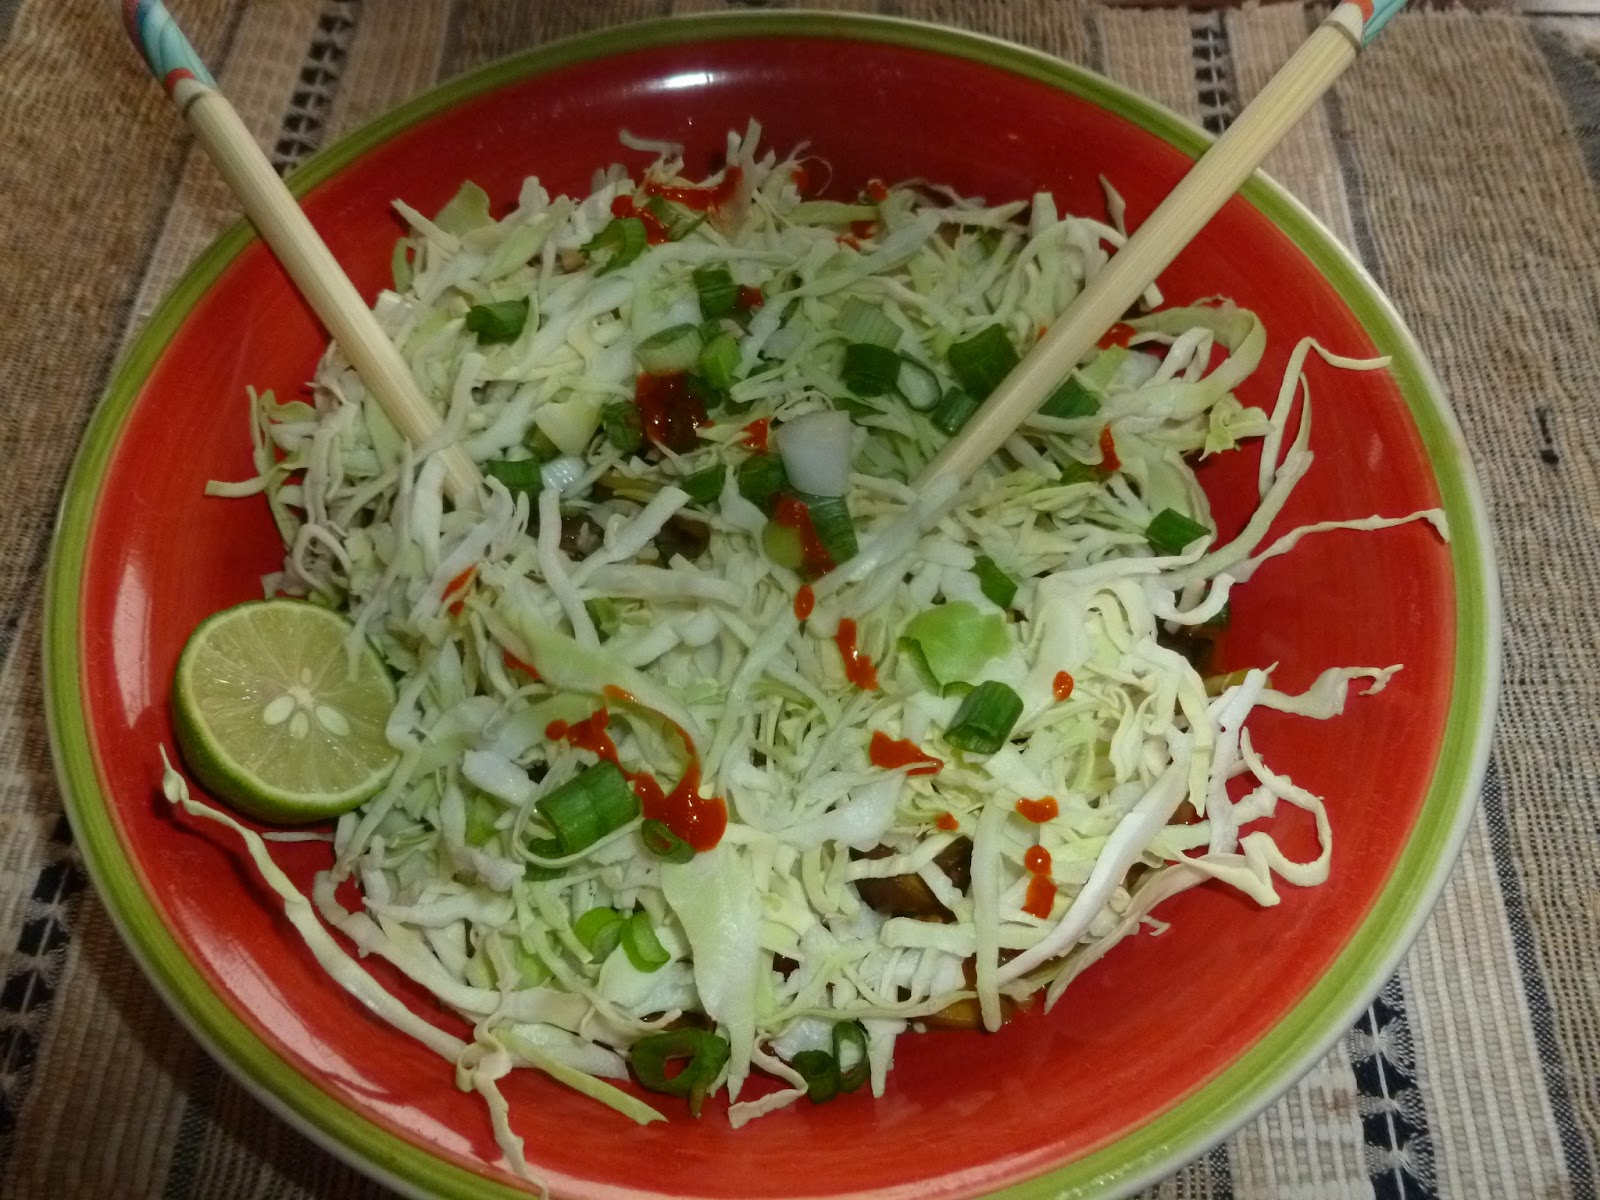
Coconut Curry Tempeh Chow Mein


Being a self-proclaimed foodie, an adventurous cook and now, a food blogger, I have an endless list of new foods to try and cook. I am at adventurous best when it comes to any vegetarian food. I don't mind trying anything new as long as it's vegetarian. But Tempeh looked scary to me. I don't know why. But when I came across Coconut Curry Marinated Tempeh, I couldn't resist buying it. Coconut and Curry  - what not to like? - I asked myself.

I, more or less, followed the recipe on the back of the packet and served with the chow mein noodles. If I have to analyze my experience with Tempeh honestly, I thought that  the curry flavor was a little too overwhelming for me. Look who's talking!!

Coconut Curry Tempeh Chow Mein
Ingredients
1 pkg Coconut Curry Marinated Tempeh, cut into small pieces
2 tbsp oil
1 large eggplant, peeled & cubed
salt

1/2  onion, diced
2 cloves garlic, minced
10 thai basil leaves, shredded
5-6 mushrooms, sliced
1 red pepper, sliced

1/4 cup coconut milk (optional)

1 pkt Annie Chun's Chow Mein Noodles
A dash of Soy Sauce

Garnish
Shredded cabbage
Sriracha Sauce
Spring onions, cut
Lime wedges

Method
1. Sprinkle salt on the eggplant to remove any bitter juices. Heat oil in a cast iron pan. Saute Tempeh till it's brown on both sides. Set aside.
2. In the same pan, add eggplant pieces and crist them on both sides. Set aside.
3. In another saucepan, heat a spoonful of oil. Saute onion, garlic and basil leaves. Add mushroom and bell peppers. Once they are cooked, add salt and pepper to taste. Drizzle Soy sauce. Add coconut milk if using.
4. Prepare noodles per instructions.
5. In a sauce pot, mix noodles, tempeh, eggplant and onion-mushroom-bell pepper mixture. Adjust for seasonings.
6. Just before serving, garnish with shredded cabbage, spring onions sriracha sauce and lime wedges.

Note -
1. I modified the recipe and added more veggies and coconut milk as I found the curry marinated tempeh a bit overwhelming.


Print Page

Wednesday, April 3, 2013

Crockpot "Chhole"


Sue was my first American friend. I had many acquaintances but she became my first American friend. I learnt many things from Sue.  She taught me many cultural things which were so new to me then. St Patrick's day - need to wear green else you will get pinched,  Thanksgiving, Pampered chef parties, Secret Santa, Baby shower games, charity events....the list is just endless. "Do you know any cooking with Crock pot?" - She had asked me once. I had no idea what she was talking about. She was not ready to accept me as a versatile cook because I didn't know the basics. (Crock pot cooking is as basic as you can get, it seems!!) Sue was much older than I was then. She invited me for the Pampered Chef party hosted by her. She showed me her crock pot. She would set the crock pot in the morning before leaving for work and by the time, she was home, delicious meal was ready. I was skeptical. I hate to keep anything switched on while there is  none at home. I think of possible hazards. But it worked okay for her. She taught me how to make Cincinnati chili in the crock pot. She was very proud of it. I attended many "firsts" with her in America. I attended first American wedding, first baby shower, first Secret Santa exchange, first juvenile diabetes walk, first Thanksgiving. She gave me the first Christmas ornament. I still put it up on our Christmas tree. Unfortunately, I also attended the first funeral. Sue passed away due to heavy Diabetes.

I don't use Crock pot as frequently as Sue used to do. But every once in a while, it shows up during the pantry cleaning. I make Sue's chili recipe without using meat - adding Indian spices, thus makings our good old Rajma. Once, the crock pot is out of the pantry, I make chholes, palak paneer, masoor, lobiya. My novelty lasts for a few days, before I wrap it back up and set it aside. During this year's pantry cleaning, my crock pot and slow cooker are out. Let's see how long I am able to use them.

Many American cooks use garbanzo beans or kidney beans from the can and add it to the crock pot. I generally have my own batch of pressure cooked beans ready to be used in the freezer. So I use pressure cooked beans. The best part of using crock pot is you can get away without needing any oil.

Crock pot Chhole
Ingredients
1 cup dry garbanzo beans/kabuli chane
salt to taste
2 cups water

1 tsp garam masala
1 tbsp coriander-cumin powder
1 tsp mild chili powder
1/2 tsp turmeric powder

Grind to paste
1 cup roughly chopped onion
1/2 cup roughly chopped tomatoes
3-4 cloves garlic, peeled & chopped
1" ginger, peeled & chopped

Garnish
1 tbsp minced cilantro
Lemon wedges

Method
1. Soak garbanzo beans overnight. Pressure cook next morning.
2. Place all the ingredients in the crock pot and switch to "High" setting.
3. Let it cook for 5 hours.
4. Adjust for seasoning.
5. Switch to "Low" till ready to eat.
6. Garnish with chopped cilantro and lemon wedges before serving.

Note-
1. Use canned garbanzo beans if you wish.


Print Page

Monday, April 1, 2013

Idlichi "Brown" Chutney


Remember, my mom's Idlichi chutney? Well, I made idlies and was all set to make that chutney but it was one of those days, when I didn't have green chilies and coconut was in the freezer. So I substituted and improvised and my Idlichi "Brown" chutney got created. I increased the amount of daals to add more protein.

Idlichi Brown Chutney
Ingredients
1 1/2 cup scraped coconut

2 tbsp urad daal
1/2 tsp oil
2 tbsp puffed chana daal/pandharpuri daaLe
4-5 red chilies such as byadgi (increase or decreased per desired spice level)


Salt to taste
1 tsp sugar
1 tsp tamarind paste
water as needed

Tempering
1 tsp oil
1/2 tsp mustard seeds
1/2 tsp asafoetida
1 sprig curry leaves, torn

Suggested Accompaniment
Idlies
or
Dosas

Method
1. In a cast iron pan, roast urad daal till it changes color. It should be reddish brown but not brunt black. Add 1/2 tsp oil when the daal changes color and fry for about 30 seconds more.
2. Take off the urad daal and now roast puffed chana daal till it changes color. Set aside with urad daal to cool down.
3. Roast coconut till it is reddish brown. Do not let it burn.
4. Grind all the roasted ingredients with salt, sugar, tamarind. Use water as needed. Grind to a coarse paste making sure that the daals are completely ground.
5. Heat oil in a small saucepan. Add mustard seeds, asafoetida and curry leaves. Drizzle the tempered oil over the chutney. Mix well.
6. Serve with idlies or dosas.

Note-
1. Omit sugar if you do not like your chutney to have a sweetish note.


Print Page